How To Install Roll Roofing Complete Guide?
Pre-Installation Preparation
To prepare for the installation of your roll roofing with this complete guide, it is important to carefully check your roof for damage, gather all necessary materials, and measure the roof area. These crucial steps will help ensure a smooth and successful installation process.
Checking the Roof for Damage
A Deep Look at the Roof’s State
Check if your roof is ready for a new installation with these steps:
- Exterior Inspection – Look for missing/damaged shingles, wall/ceiling cracks, and dents.
- Check the Attic – Look for water stains/mold, sunlight, pests, and wear and tear.
- Gutters – Use a ladder to check for clogs and drainage issues.
- Flashing – Check if it’s rusty, has gaps, or worn sealing.
- Professional Help – Consult experienced roofers if damage is visible.
Remember, extreme weather can worsen preexisting damage. A client of ours learned this the hard way. They moved into a renovated home without inspecting the roof first. Two months later, a downpour caused flooding in their attic. They ended up doubling their repair budget because they didn’t take precautionary steps.
Prepare the materials you need before starting the installation – otherwise, you’ll regret it!
Gathering the Required Materials
Gather all the materials you need for an easy installation. Here’s what to get:
- Product or equipment
- Tools
- Instructions and manuals
- Safety gear (if needed)
- Cleaning supplies (if needed)
- A good workspace
Plan ahead to make sure your installation goes smoothly. Study the product instructions to know which materials to collect. This way, installation day won’t be delayed.
For a successful installation process, it’s important to have all the necessary materials ready. Not having them can lead to incomplete installations and costly mistakes. So, remember: measuring the roof area is like drawing a rectangle – but on your house and with more at stake!
Measuring the Roof Area
Before installing a roof, it must be accurately measured. This can be done with satellite imaging, aerial mapping, or on-site calculations.
To get the roof area, use the following table:
Roof Shape | Calculation |
|---|---|
Flat | Length x Width |
Gable | (Length x Width) / 2 + ((Width / 2) x Eave Overhang) |
Hip | (Length + Ridge Overhang) x (Width + Eave Overhang) |
Gambrel | 1/2 (Width1 + Width2) x Length |
Things like slope, overhang, vents, and dormers should also be taken into account. Document all measurements for accurate estimates.
Roof measurement has been around since ancient Greece. It’s important to measure accurately to make effective use of materials and avoid waste. Underlayment is like a supportive friend for your floors.
Installing the Underlayment
To install roll roofing with ease, choosing the right type of underlayment, laying the underlayment, and cutting the underlayment to size should be your go-to solutions. In this segment of ‘Installing the Underlayment’ in ‘How To Install Roll Roofing complete guide’, we will guide you through these essential sub-sections briefly.
Tired Of Fighting With 4 Other Contractors To Win New Leads?
We help contractors find new customers with high-converting websites and locally targeted niche-specific lead-generation programs. You’ll never need to worry about running out of work again! We focus on quality over quantity with our leads for contractors.
Choosing the Right Type of Underlayment
When it comes to flooring, selecting the right underlayment is key. Here are five tips to help you out:
- Think about the Subfloor: Different subfloors require different underlayment. If your subfloor is concrete, you might need a moisture barrier.
- Consider Sound Proofing: If noise reduction matters, an acoustic underlayment could be a great option.
- Pick the Flooring Type: The type of flooring affects your underlayment pick. Certain laminates and floating floors require certain types of underlayment.
- Think about Insulation: The climate can factor into your underlayment choice. Cold climates might need extra insulation to keep the house warm.
- Watch Your Budget: Cost is always a factor. Find the balance between quality and affordability.
These tips are just the start. Each project is unique and has special requirements.
Choosing the right underlayment may seem tedious, but it’s essential for making sure your flooring lasts. Take your time! Evaluate your needs and choose carefully – otherwise you’ll miss out on the full potential of your new flooring. Plus, if you lay the underlayment crooked, your house will be the next attraction at the county fair’s ‘Fun House’ exhibit!
Laying the Underlayment
When prepping for installation, secure the underlayment right! Anchoring it will give a stable and even surface for your flooring. Here are 4 steps to install it correctly:
- Clean and vacuum the subfloor for a smooth surface.
- Lay down the sheets with one long edge against the wall, spaced with a 1/8 inch overlap.
- Cut around corners and fixtures, leaving some allowance between edges. Staple or tape seams together.
- Check overlaps and gaps before beginning the floor installation.
Remember, flooring can need specific underlayment. Get help from a pro to avoid costly mistakes!
Pro Tip: To get maximum performance and durability, check the underlayment for bumps and lumps before installation. It’s like playing Operation – don’t ruin your flooring!
Cutting the Underlayment to Size
Cutting underlayment to size? Here’s what to do!
- Measure the room and transfer onto your material.
- Use a knife, guided by a straight edge, to cut down the size.
- Double-check your measurements for no mistakes. It’s important to take accurate measurements and use a precise cutting technique.
- Get all the necessary tools: tape measure, straight edge, utility knife blades, and marking pen.
- Pro Tip: Use a sharp knife blade on each new cut for accuracy and smoothness.
Let’s get rollin’!
Rolling Out and Installing the Roofing Material
To properly install roll roofing material, you need to choose the appropriate type of material, lay the first row accurately, nail or glue the material correctly, and overlap the sheets consistently. These sub-sections will guide you on how to roll out and install your roofing material to ensure it is secure and withstands harsh weather elements.
A Wining Cost Estimate
That Helps You To Win More Roofing Construction Projects
Choosing the Right Type of Roll Roofing Material
When picking the best roll roofing material, various factors should be taken into account, like longevity, strength, resistance to harsh climates, and budget. Consider these options:
- Option 1: 10 Years Longevity, Low Impact Resistance, Not Resistant to Extreme Temperatures or Humidity. Most Affordable.
- Option 2: 15 Years Longevity, Medium Impact Resistance, Moderate Environmental Resistance (Suitable for Mild Climates). Mid-Range Option.
- Option 3: 20 Years Longevity, High Impact Resistance, High Environmental Resistance (Suitable for Harsh Climates). Most Expensive.
It is important to get expert advice prior to making a decision. This will guarantee the right selection that meets all of your needs.
To get the most out of your roll roofing installation project, choose carefully. If you don’t, it could lead to sub-par installations that won’t live up to your expectations. So, take time now to select the proper roll roofing materials and avoid future costly repair mistakes. Believe me, if this roofing material was any simpler to lay, it would come pre-installed!
Laying the First Row of Roll Roofing Material
Time to get romantic with your rooftop! To install the first layer of roll roofing, here’s a 3-step quick guide:
- Clean and prep the surface where you’ll lay the material.
- Cut the first layer according to your roof’s measurements.
- Start installing vertically from one side towards the other.
Secure each strip with tacks at regular intervals. Make sure each edge is covered; if unsure, call a pro. Otherwise, subsequent layers will suffer too.
Quick tip: use solar powered fans when installing a dark roof. Keeps attics cool while saving energy costs.
Don’t wait – secure your roof today with quality materials!
Nailing or Gluing the Roll Roofing Material
When it comes to affixing roll roofing, you can choose between nailing or gluing. Here’s a step-by-step guide on how to do both!
- Nailing Method:
- Measure and cut materials.
- Lay the roll roofing and nail top edge.
- Put cement adhesive to bottom half.
- Unfold and smooth the material while nailing along edges.
- Overlap seams with cement adhesive.
- Gluing Method:
- Measure and cut materials.
- Spread glue with trowel over roof deck surface.
- Lay out small sections of roll roofing, use broom to press and smooth.
- Add extra cement adhesive for overlaps and vents.
- Cover seams with overlapping strips of adhesive.
Safety is key! Always wear protective gear and get professional help if needed. Consider weather, material type and manufacturer recommendations when choosing between nailing and gluing. Get a long-lasting roof that withstands harsh conditions – start your roll roofing project today!
Get Financing For Roofing Construction Business
Maximize your roofing construction business’s potential with our competitive financing options

Overlapping the Roll Roofing Sheets
Secure your roof with roll roofing! Here’s a 6-step guide on how to overlap sheets:
- Find out the overlap distance according to manufacturer’s specs.
- Cut the first sheet, leaving an extra inch for overlap.
- Place the second sheet next to the first, overlapping as instructed.
- Cut through both layers at a 45-degree angle along the overlap.
- Apply roofing cement over the cut and press down firmly.
- Repeat until all sheets are overlapped.
Be cautious while overlapping, as an unsecured seam can ruin your roof. Also, roofs with opposing slopes should start at opposite ends of the roofline.
Pro Tip: Heat up the adhesive strip with a propane torch or heat gun before pressing onto the previous sheet, to avoid wrinkles or damages.
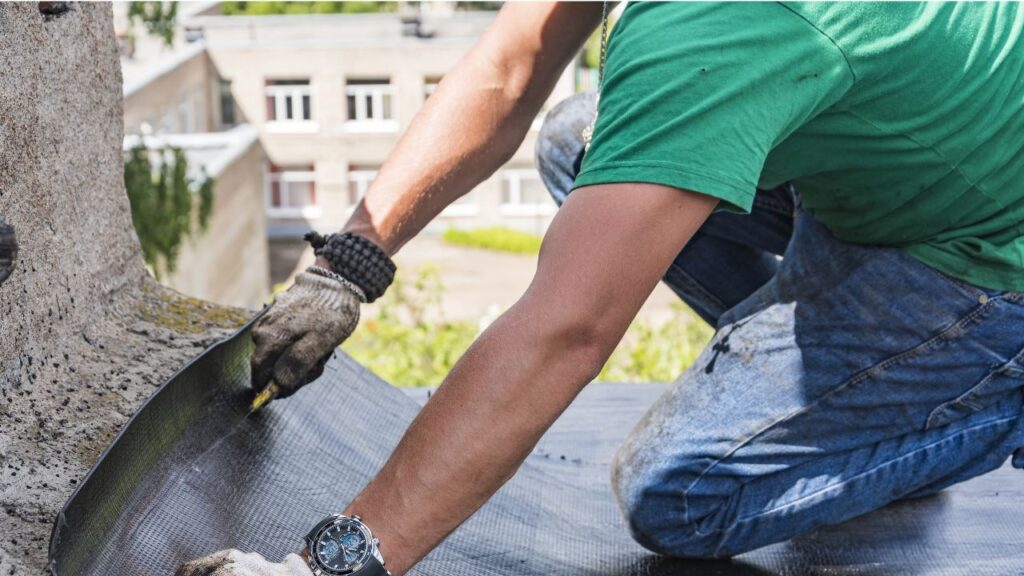
Sealing the Roll Roofing
To seal the roll roofing, you’ll need to apply adhesive or sealant to the edges and smooth out any bubbles or wrinkles. This will ensure that your roof is properly sealed and protected from water damage. Applying these steps correctly can help you achieve a long-lasting and durable roofing solution.
Applying Adhesive or Sealant to the Edges
For a tight seal on roll roofing, it’s important to use adhesive or sealant on the edges. Here’s how:
- Prep the Edges: Clean and dry the edges.
- Apply Adhesive: Use a brush or roller to put roofing adhesive on the edges. Make sure to spread it evenly.
- Press Edges Together: After applying the adhesive, press the edges down with a firm force.
Regularly check and maintain your roof for optimum protection. Failing to use proper adhesives or sealants can cause water damage, cracks, and leaks. This can lead to major property damage and expensive repairs. Use good quality polymer-modified bitumen based sealants for the best results.
If you want to get rid of roof wrinkles, try some strategic ironing! But watch out for the landlord!
Smoothing Out Any Bubbles or Wrinkles
A smooth installation of roll roofing is essential for long-term durability. To help you achieve a professional finish, here are five simple steps:
- Start in the center of the roof and gently lay the roll roofing.
- Smooth any bubbles with your hands and use a roller to eliminate air pockets.
- Cut along the edges to remove excess material and make a seamless appearance.
- Press down any areas that have wrinkles until they are flattened.
- Check for imperfections and address them before moving on.
For best results, use special tools or get guidance from a pro. Start small and be patient – and don’t forget the disco ball! That’ll really make your roof shine!
Unlock the Power of Expertise for Your Project - Hire a Professional Contractor Today!
Discover the transformative power of hiring professional contractors for your project. Unlock a wealth of expertise and experience to ensure success. Get started today and see the difference!
Finishing Touches
To finish your roll roofing project with a professional touch, you need to complete the “Finishing Touches” section. “Trimming the Edges” will ensure a clean and fitted look. “Adding a Protective Coating (optional)” will extend the life of your roof. Finally, “Cleaning Up the Work Area” will leave your property tidy.
Trimming the Edges
Groom the Edges!
When you want your project to look polished, trimming the edges is key. It gives a clean look and adds a professional touch. Here’s how to do it right:
- Make sure your cutting tool is sharp enough for a crisp cut.
- Tape areas you don’t want to cut accidentally.
- Use steady hand and smooth movements to trim off excess or uneven edges.
- After trimming, use sandpaper or a file to smoothen the surface.
Safety is important! Always wear protective gear like gloves and goggles when using sharp tools.
A well-finished edge can boost your project’s aesthetic appeal and value. 87% of potential buyers are willing to pay more for projects with nicely polished edges (source: Home Design Trends Magazine).
Protect your masterpiece with a coating that can even withstand a nuclear apocalypse!
Adding a Protective Coating (optional)
To safeguard your work, add a Protective Coating (optional). It will help preserve the quality and durability of your creation for a long time. Here’s how to do it:
- Find a well-ventilated spot.
- Clean and dry your work.
- Follow the manufacturer’s instructions when applying the coating.
- Let the work air-dry and don’t touch it until it’s fully dry.
- Check later if any extra coats are needed.
Don’t put more than two layers of protection. Excess coatings could affect the originality of the end result.
Applying a Protective Coating (optional) means your efforts won’t go to waste. It will act as a barrier against external elements such as moisture, dust particles, and UV radiation which could dull or discolor your work.
Don’t miss out on this chance to protect your creations. Put a Protective Coating (optional) on now and enjoy them for years to come! Cleaning up after a project is like finding the end of a roll of tape – it’s always tricky!
A Wining Cost Estimate
That Helps You To Win More Roofing Construction Projects
Cleaning Up the Work Area
Cleanliness is vital for a safe and productive workplace. Follow these 5 steps:
- Put away tools and equipment.
- Wipe down surfaces with disinfectant.
- Dispose of any waste in the correct bins.
- Sweep or vacuum the floor area.
- Double-check everything’s been wiped down.
It’s worth it! A tidy workspace can boost productivity and help you concentrate, allowing you to get more done in less time.
Pro Tip: Keep a mini trashcan near your station to avoid multiple trips to the trash bins.
FAQs
Roll roofing is a thin, flexible roofing material that is commonly used on low-sloping roofs and as an underlayment for other roofing materials.
To prepare your roof for roll roofing installation, you should clean it thoroughly, remove any existing roofing materials, and make any necessary repairs to the roof surface.
To measure your roof for roll roofing, you need to determine the square footage of your roof by measuring the length and width of each section of the roof and then multiplying them together.
To install roll roofing, you will need a variety of tools, including a utility knife, roofing cement, roofing nails, a hammer, a chalk line, and a roofing roller.
To install roll roofing, you will need to first lay down a layer of roofing cement, then unroll the roofing material onto the cement and use a roofing roller to press it firmly into place. You will then need to nail down the edges of the roofing material and apply additional layers of roofing cement as needed.
Roll roofing typically lasts between 5 and 10 years, though this can vary depending on factors such as the quality of the roofing material, the climate in which it is installed, and the level of maintenance it receives.
Process To Get Roofing Construction Cost Estimate Report
Here I am going to share some steps to get your roofing construction cost estimate report.
-
You need to send your plan to us.
You can send us your plan on info@estimatorflorida.com
-
You receive a quote for your project.
Before starting your project, we send you a quote for your service. That quote will have detailed information about your project. Here you will get information about the size, difficulty, complexity and bid date when determining pricing.
-
Get Estimate Report
We do roofing construction cost estimating and prepare a detailed report for your project. At last, you finalize the report and finish the project.