How to Install Radiant Floor Heating in an Existing House?
Adding radiant floor heating to your existing house can make it incredibly cozy and energy-efficient. Unlike traditional heating systems, radiant floor heating warms the floor itself, which then radiates heat evenly throughout the room. This method not only increases comfort but also boosts energy efficiency, making it a smart investment. This guide will walk you through the process of installing radiant floor heating, covering all the essential steps from planning to execution.
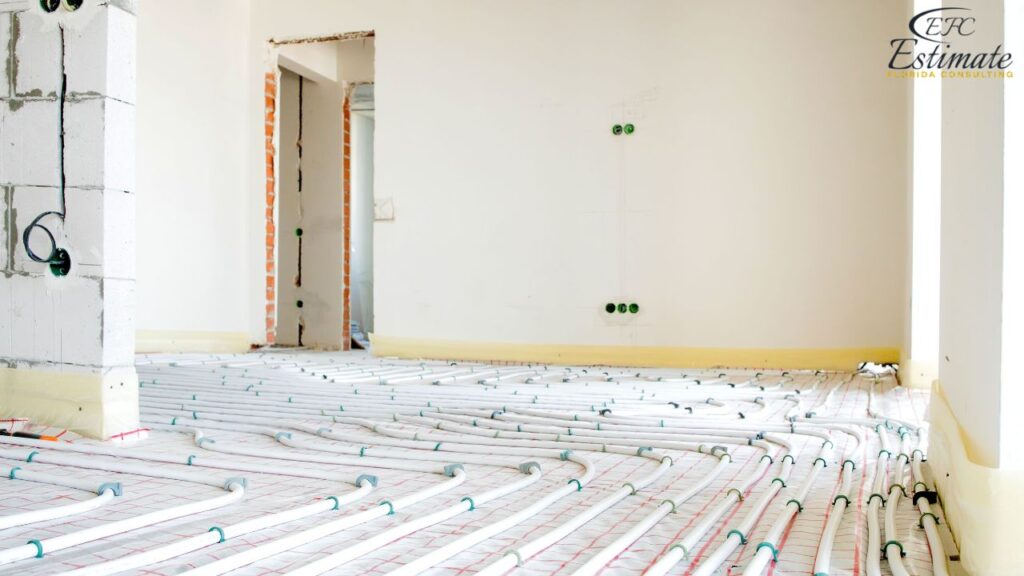
Benefits of Radiant Floor Heating
Energy Efficiency
Radiant floor heating is known for its excellent energy efficiency. By delivering heat directly to the floor and the objects in the room, it minimizes energy loss compared to forced-air systems that often lose heat through ducts. This means you can keep your thermostat set lower while still feeling warm and comfortable, leading to significant energy savings over time. Additionally, radiant floor systems often allow for zoned heating, meaning you can heat only the rooms you use, further enhancing energy efficiency.
Comfort
The comfort provided by radiant floor heating is unmatched. The system spreads heat evenly across the floor, eliminating cold spots and drafts. Imagine stepping onto a warm floor on a chilly morning—it’s a luxurious experience. Plus, because radiant floor heating operates silently, it enhances the comfort of your living space without the noise that comes with forced-air systems. This even warmth creates a cozy, inviting atmosphere in your home, making it much more enjoyable, especially during colder months.
Improved Air Quality
Since radiant floor heating doesn’t use forced air, it doesn’t circulate dust, pollen, or other allergens throughout your home. This results in better indoor air quality, which is especially beneficial for people with allergies or respiratory issues. The lack of moving air also means fewer drafts and more stable indoor temperatures. Overall, this system helps create a healthier living environment by reducing the circulation of airborne particles.
Planning and Preparation
Assess the Existing Flooring
Before you start, take a good look at your current flooring. Radiant floor heating can go under various types of flooring, including tile, hardwood, laminate, and carpet, but each type might require a different installation approach. Tile and stone are excellent conductors of heat and work particularly well with radiant systems, while hardwood and laminate need careful handling to avoid damage from heat. Understanding your flooring’s compatibility with radiant heating is crucial to ensure efficient heat transfer and prevent any potential damage.
Choose the Right Heating System
There are two main types of radiant floor heating systems: electric and hydronic (water-based). Electric systems are typically easier and cheaper to install, making them a good option for smaller areas or retrofits. Hydronic systems, which circulate warm water through tubes, are more efficient for larger spaces and generally more cost-effective over time. Choose the system that best suits your needs based on the size of the area you want to heat, your budget, and your existing heating infrastructure. Hydronic systems, although initially more expensive to install, offer better long-term energy savings and are ideal for whole-house installations.
Gather Materials and Tools
To install radiant floor heating, you’ll need the following materials and tools:
- Electric Heating Mats or Cables (for electric systems): These are essential components for electric radiant heating systems, designed to be installed under various types of flooring.
- PEX Tubing (for hydronic systems): Flexible tubes used in hydronic systems to circulate heated water.
- Insulation Boards: To prevent heat loss and direct heat upwards. Proper insulation is crucial to the efficiency of the system.
- Thermostat: To control the heating system, allowing you to set and maintain the desired temperature.
- Manifold System: For distributing water in hydronic systems, ensuring even heat distribution across all zones.
- Tools: Tape measure, utility knife, staple gun, PEX cutter, concrete saw (if necessary), and a drill. Having all the necessary tools and materials on hand will help streamline the installation process and prevent delays.
Having all the necessary materials and tools ready before starting the installation will help streamline the process and prevent delays. It’s also important to familiarize yourself with the installation process and the function of each component to ensure a smooth and efficient installation. Proper planning and preparation can significantly impact the overall success and efficiency of your radiant floor heating system.
Step-by-Step Installation Process
1. Prepare the Subfloor
Ensure the subfloor is clean, level, and free of debris. If you’re installing a hydronic system, you may need to cut channels in the subfloor for the PEX tubing. This step is crucial for ensuring the heating system can be installed evenly and efficiently. Proper preparation of the subfloor provides a stable base for the heating elements and helps to ensure even heat distribution. This might involve repairing any cracks or imperfections and ensuring that the surface is adequately insulated to maximize the efficiency of the heating system.
2. Install Insulation
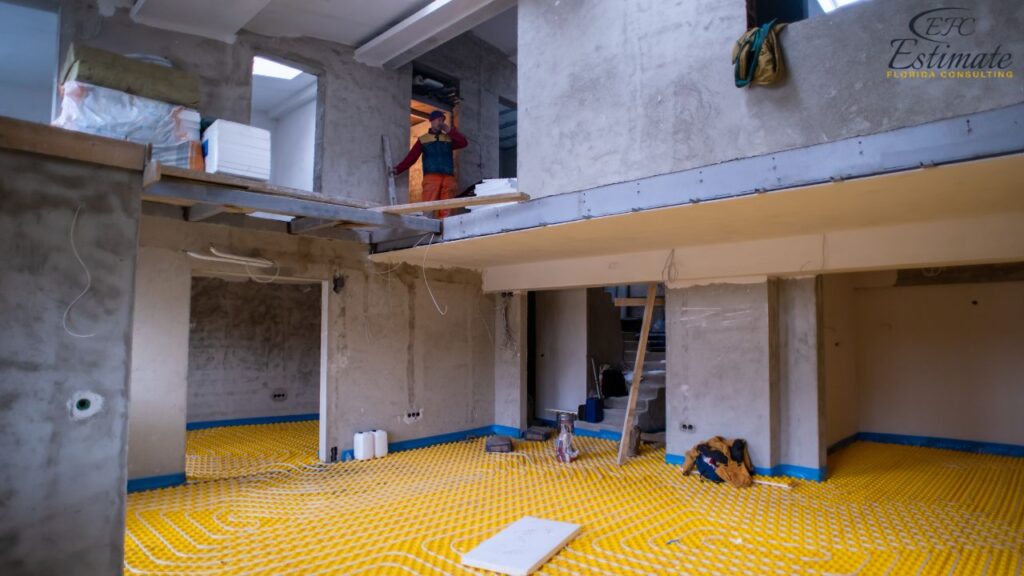
Lay insulation boards over the subfloor to prevent heat loss and ensure the heat is directed upwards into the room. The insulation should cover the entire floor area to maximize efficiency. Securing the insulation with adhesive or mechanical fasteners ensures it stays in place during the installation of the heating system. Proper insulation is essential for the efficient operation of the radiant floor heating system. Insulation helps to retain heat within the living space, reducing energy consumption and improving the overall effectiveness of the system.
3. Lay Out the Heating System
Electric Systems:
- Roll out the electric heating mats or lay down the heating cables according to the manufacturer’s instructions. These should be spaced evenly to ensure consistent heat distribution.
- Ensure the heating elements are evenly spaced to provide uniform heat distribution. Follow the specific guidelines provided by the manufacturer for optimal performance.
- Secure the mats or cables with adhesive or staples. Make sure they are firmly attached to avoid movement during the installation of the flooring.
Hydronic Systems:
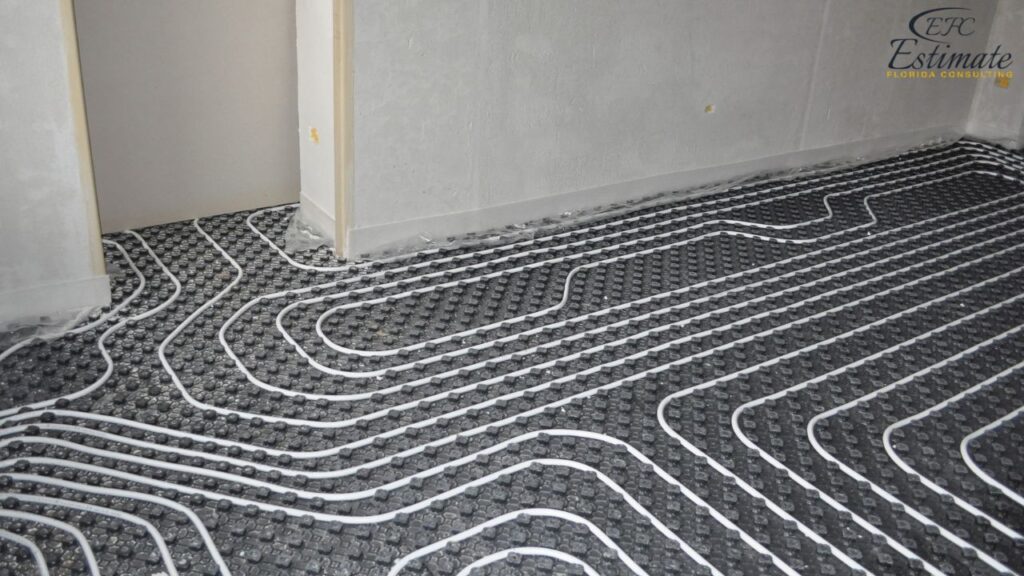
- Lay out the PEX tubing in a serpentine or spiral pattern to ensure even heat distribution. This pattern helps to maximize the efficiency of the heat transfer.
- Use zip ties or clips to secure the tubing to the insulation or subfloor. Properly securing the tubing prevents movement and ensures an even distribution of heat.
- Connect the tubing to the manifold system, ensuring all connections are tight and secure. The manifold system will distribute the heated water evenly throughout the tubing.
4. Install the Manifold System (Hydronic Only)
Mount the manifold system on a wall near the heat source. Connect each loop of PEX tubing to the manifold using appropriate fittings. Secure the connections tightly to prevent leaks. The manifold should have individual controls for each loop, allowing you to balance the system and adjust flow rates as needed. Proper installation of the manifold system ensures efficient operation and easy maintenance of the heating system. The manifold allows for precise control over the heating system, enabling you to adjust the temperature and flow in different zones.
5. Pressure Test the System (Hydronic Only)
Before covering the tubing, it’s essential to pressure test the system to ensure there are no leaks. Fill the system with water and pressurize it according to the manufacturer’s specifications. Monitor the pressure for at least 24 hours to confirm that there are no leaks. If any leaks are detected, repair them before proceeding. Pressure testing is crucial to identify and fix any potential issues that could compromise the efficiency and integrity of the heating system. This step ensures that the system is leak-free and ready for concrete pouring or flooring installation.
Download Template For Radient Floor Heating Project Breakdown
- Materials list updated to the zip code
- Fast delivery
- Data base of general contractors and sub-contractors
- Local estimators

6. Install the Flooring
For Electric Systems:
- Apply a thin layer of thin-set mortar over the heating mats or cables. This helps to secure the heating elements and prepare the surface for the final flooring.
- Lay the flooring material, such as tile or stone, over the mortar. Ensure that the flooring is evenly laid to avoid any gaps or uneven surfaces.
- Allow the mortar to cure according to the manufacturer’s instructions. Proper curing is essential to ensure the durability and stability of the flooring.
For Hydronic Systems:
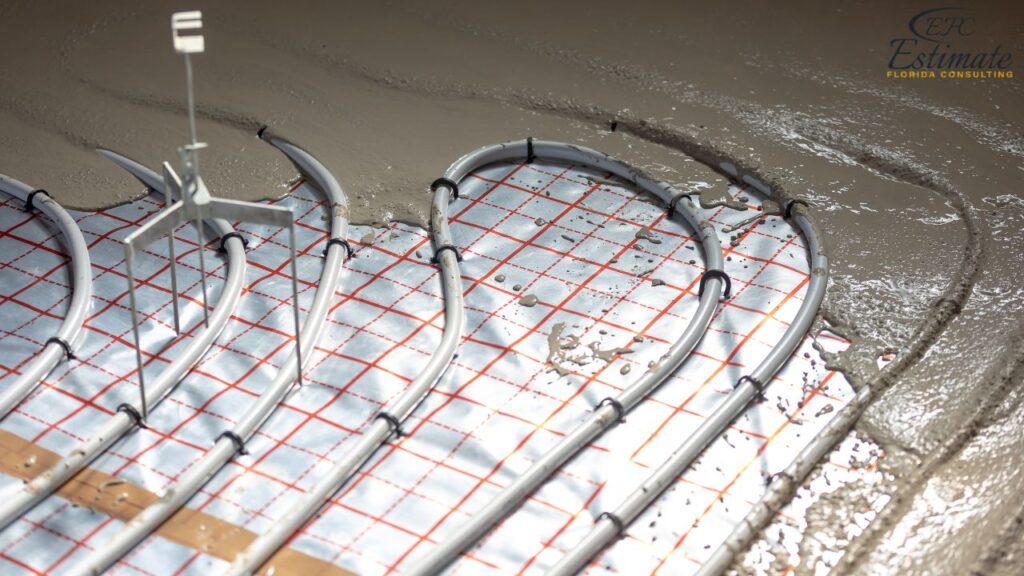
- Pour a thin layer of self-leveling concrete over the PEX tubing to embed the tubing in the floor. This creates a smooth and stable surface for the final flooring.
- Once the concrete has cured, install the flooring material, such as tile, hardwood, or laminate. Ensure that the flooring is compatible with the radiant heating system and is installed according to the manufacturer’s guidelines.
7. Connect the Heat Source
Electric Systems:
- Connect the heating mats or cables to the thermostat according to the manufacturer’s instructions. This allows you to control the temperature and operation of the heating system.
- Ensure all electrical connections are secure and comply with local building codes. Proper electrical connections are essential for the safe and efficient operation of the system.
Hydronic Systems:
- Connect the manifold to the heat source, such as a boiler or water heater. Ensure that the heat source is capable of providing the necessary heat for the radiant system.
- Follow the manufacturer’s instructions for connecting and configuring the system. Proper configuration ensures optimal performance and efficiency.
- Ensure all connections are secure and the system is properly filled and purged of air. This step is crucial to prevent air pockets and ensure smooth operation.
8. Test and Balance the System
Once the system is connected, test it to ensure it operates correctly. Check for leaks and verify that the water or electricity flows smoothly through the system. Adjust the flow rates and balance the system to achieve even heating across the entire floor area. Proper testing and balancing are crucial for ensuring the system operates efficiently and provides consistent warmth throughout the space. Testing and balancing help to ensure that all parts of the system are functioning correctly and that the heating is evenly distributed.
9. Final Inspection and Start-Up
Conduct a final inspection to ensure all components are installed correctly and functioning. Turn on the heat source and gradually increase the temperature to avoid thermal shock to the flooring. Monitor the system over a few days to ensure it operates smoothly and efficiently. This final phase ensures that the installation is successful and that the system is ready to provide reliable heating. Address any final adjustments or concerns during this period to ensure optimal performance.
Maintenance and Tips
Regular Maintenance
To keep your radiant floor heating system running efficiently, perform regular maintenance checks. This includes inspecting the manifold, checking for leaks, and ensuring the heat source is functioning correctly. Periodically flush the system to remove any sediment or debris that may accumulate in the tubing. Regular maintenance helps prevent issues and extends the lifespan of the system, ensuring consistent performance and energy efficiency. Schedule professional inspections annually to maintain the system’s optimal performance.
Energy Efficiency Tips
- Set a Consistent Temperature: Reduces frequent cycling of the system, saving energy.
- Use Programmable Thermostats: Optimizes energy use by adjusting temperatures based on your schedule.
- Ensure Proper Insulation: Maximizes the efficiency of the heating system by preventing heat loss. Proper insulation of your home can significantly reduce energy consumption and enhance the overall effectiveness of the radiant floor heating system.
Get 5 New Leads Next 7 Days With Our System
- Multi-Family House
- Single-Faimly House
- Modern House
- Duplex
- Ranch House
- Bungalow
Troubleshooting Common Issues
- Uneven Heating: Check for air pockets in the tubing and purge the system if necessary. Uneven heating can also be caused by incorrect tubing spacing or imbalanced flow rates.
- Low Water Pressure: Inspect for leaks or blockages in the system; ensure all connections are secure and properly tightened.
- Strange Noises: These may indicate air in the system or issues with the pump. Bleed the system and check the pump operation to resolve these issues. Regular maintenance and prompt troubleshooting can prevent minor issues from becoming significant problems.
Conclusion
Installing radiant floor heating in an existing house requires careful planning and precise execution. By following this detailed guide, you can ensure a successful installation that provides efficient and comfortable heating for your home. Radiant floor heating offers numerous benefits, including energy efficiency, improved comfort, and enhanced air quality. Proper installation and regular maintenance will ensure your system operates efficiently and effectively for years to come. Investing in radiant floor heating not only enhances your home’s comfort but also adds value to your property and contributes to long-term energy savings.
FAQs
Radiant floor heating is a system that heats your home by warming the floor, which then radiates heat evenly throughout the room. It offers a comfortable and energy-efficient alternative to traditional heating methods.
Yes, radiant floor heating can be installed in most existing houses, but it’s important to assess your current flooring and heating system compatibility before proceeding.
Different flooring types may require different installation approaches. Tile and stone are excellent conductors of heat, while hardwood and laminate need careful handling to avoid damage from heat.
Ensure the subfloor is clean, level, and free of debris. For hydronic systems, you may need to cut channels in the subfloor for the PEX tubing.
The manifold system distributes water evenly through the PEX tubing and allows for individual control of each heating zone.
Fill the system with water, pressurize it according to specifications, and monitor for at least 24 hours to check for leaks.
For electric systems, connect heating mats or cables to the thermostat. For hydronic systems, connect the manifold to the heat source and follow the manufacturer’s instructions.
Conduct a final inspection, gradually increase the temperature to avoid thermal shock, and monitor the system for a few days to ensure smooth operation.
Google Reviews



Process To Get CCTV Cameras Cost Estimate Report
Here I am going to share some steps to get CCTV cameras cost estimate report.
-
You need to send your plan to us.
You can send us your plan on info@estimatorflorida.com
-
You receive a quote for your project.
Before starting your project, we send you a quote for your service. That quote will have detailed information about your project. Here you will get information about the size, difficulty, complexity and bid date when determining pricing.
-
Get Estimate Report
Our team will takeoff and estimate your project. When we deliver you’ll receive a PDF and an Excel file of your estimate. We can also offer construction lead generation services for the jobs you’d like to pursue further.

