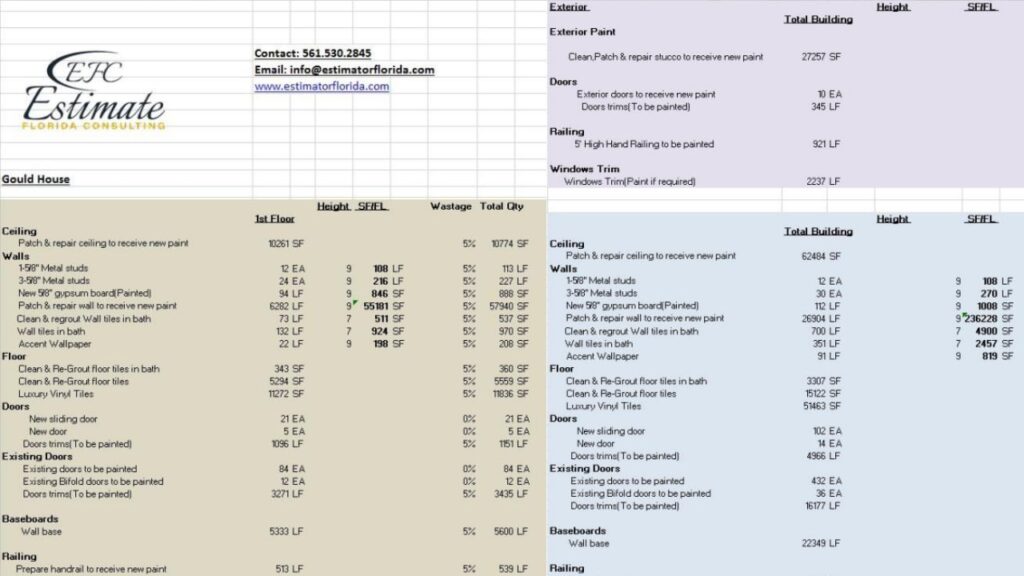
Estimating the Price of Installing Electrical
Outlets and Switches
Estimated Cost of Installing Electrical Outlets and Switches
To estimate the price of installing electrical outlets and switches, you need to consider several factors. The average cost can vary widely depending on these factors. In this section, we’ll be discussing the estimated cost of installing electrical outlets and switches, covering the factors affecting the cost of installation, as well as the average costs, to help you determine the overall budget for your project.
Factors Affecting the Cost of Installing Outlets and Switches
Factors that affect the cost of installing electrical outlets and switches include type of outlet, labor costs, location, and nature of electrical work.
This table gives additional info on how these factors affect the cost:
Factors | How It Affects Cost |
|---|---|
Type of Outlet | A two-prong or GFCI/USB outlet will differ in cost. |
Labor Costs | Depends on time to install and electrician’s hourly rate. |
Location | Permits or tools needed may add charges. |
Nature of Work | Price may increase if extra wiring or repair is required. |
Package Deals | Some contractors offer package deals that may be cheaper than single services. |
Pro Tip: Get quotes from multiple electricians – prices may vary based on experience and qualifications. Time to do some math, or just guess and hope for the best with the number of outlets/switches needed!
Number of Outlets and Switches Needed
Evaluating electrical layout reqs? No problemo! Let’s assess room dimensions, determine what type of occupancy it is, and figure out major appliance requirements. And don’t forget to consider additional appliances, user preferences, and future use considerations. Plus, think about safety: GFCI near wet areas in a residential setting. Electricians usually charge $75-$250 per outlet installed. Fun fact: 90% of homeowners switch to LED lights for their long lifespan. Get ready to make your electrifying renovation dreams come true!
Type of Outlet and Switches Required
When selecting outlets and switches for your electrical installation, several factors must be considered. These include the purpose of the space, location, and wiring. Knowing these variables is essential for making the right choice.
The table below offers info on different types of outlets and switches and their associated costs.
Type | Use | Cost |
|---|---|---|
Standard Outlet | General Use | $75 – $150 |
GFCI Outlet | Outdoor or Wet Area Use | $130 – $200 |
USB Outlet | Charging Mobile Devices | $100 – $150 |
Three-Way Switches | Lighting Control from Two Locations | $150 – $250 |
Four-Way Switches | Lighting Control from Three or More Locations | $200 – $350 |
Be aware that these are only estimates. The final cost may vary due to labor charges, location, materials, and other costs. It’s best to hire a reliable electrician to get an accurate quote.
The right outlets and switches can make a world of difference. Installing them in the wrong places would be a disaster! So take time to think through your needs carefully.
Lastly, I recall a colleague who was electrocuted after neglecting safety measures while installing an outlet. This highlights the importance of using professionals rather than attempting DIY projects. Let’s prioritize safety! Solving the puzzle of electrical outlets and switches is like trying to solve a Rubik’s Cube with a blindfold on.
Complexity of the Installation
Installing switches and outlets is complex. Factors like type of electrical outlet or switch, location, wiring, overloads, and fire retardant materials can make it hard. Plus, hidden complexities can pop up even for experienced electricians!
If you’re not sure what you’re doing, always seek help from a licensed professional. One friend tried to do it themselves and ended up with a lot of damage to their home’s electrical system! So, take it from them: it’s best to save yourself the hassle and expense.
Average Cost of Installing Outlets and Switches
To work out the price of installing electrical outlets and switches, several things must be considered. These include the count of units, their placement, and if wires are available. With these details, we can estimate the cost for each type of outlet and switch.
See the table for the average cost per location in a house.
Type of Unit | Living Room | Kitchen | Bedroom | Bathroom |
|---|---|---|---|---|
Electrical Outlets | $200 – $450 | $250 – $500 | $150 – $300 | $250 – $400 |
Light Switches | $130 – $220 | $120 – $240 | $100 – $200 | $180 – $280 |
But, these prices may change, depending on the factors mentioned. Also, hiring a certified electrician will increase the cost, but safety will be ensured.
We suggest getting recommendations from family and friends when selecting an electrician. You may also combine several projects to get discounted rates from contractors.
Cost of Electrical Outlets
The cost of installing electrical outlets varies depending on many things such as the number of outlets, type of outlet, and how complex the installation is. Let’s dive in and learn what you may pay.
Outlet Type | Cost per Outlet (no labor) |
Standard Electrical Outlet | $5 – $15 |
GFCI Outlets (Ground Fault Circuit Interrupter) | $20 – $50 |
AFCI Outlets (Arc Fault Circuit Interrupter) | $30 – $60 |
Note that these prices are only estimates. Prices can differ based on different factors. Plus, labor costs can make the overall price go up.
When installing electrical outlets, remember to check if extra wiring or repairs are needed before. It’s also best to hire a licensed electrician for complex installations to stay safe and get the job done quickly.
To save money, buy materials yourself rather than relying on your electrician. You can also buy supplies in bulk from suppliers at a discounted rate.
Planning and professional advice are key to an efficient and cost-effective installation. So, electrify your wallet and get those switches installed!
A Wining Cost Estimate
That Helps You To Win More Electrical Construction Projects
Cost of Electrical Switches
When it comes to installing electrical switches, there are various factors to consider. For example, the type of switch, installation location, and labor cost. To gain insight into the cost, we created a table that breaks down prices based on different types of switches. Single-pole switch installations usually start at $70, while three-way switches may require around $90.
Design-based factors, like style and material, may also influence costs. Other components to consider are installation time and part replacements for outdated systems.
To minimize expenses, think ahead and create a list of all the parts you need. Research suitable locations before hiring an electrician. Electricians charge per hour, so consider doing it yourself to save money.
Labor Costs
The expense of personnel needed to install electrical outlets and switches is called Personnel Expenses. Basically, hiring certified electricians to guarantee a secure and high-quality job.
Overview of Labor Costs in installing electrical outlets and switches:
Electrician Pay Per Hour | Avg. Time Required for Installation |
|---|---|
$40 – $80 Per Hour | 1-2 Hours |
These estimates are based on factors such as location, complexity of wiring needed, and type of electrical outlet/switch being installed.
Also, equipment and materials have to be taken into account. These can include cables, connectors, conduits, circuit breakers, and protective gear. Costs may alter depending on the job’s specific requirements.
It can be tempting to try a DIY approach to save money when doing electrical outlet and switch installations, but it’s recommended to consult a licensed electrician. This can avoid further injury or damage from improper installation, which could be more expensive in the long run.
Be smart and hire a certified electrician for your next installation project. Don’t take any chances with safety.
Overall Cost Estimation Examples
For the cost estimation examples section, we can provide further insights. One example can be showcasing the estimated cost of electrical outlets and switches. We can present a table with actual data. This table will have the following sections:
- Number of outlets and switches
- Labor costs
- Materials expenses
- Total project cost
This table will be a helpful reference for planners. Costs for electrical installations depend on different factors, including project location, complexity of wiring, and other repairs or upgrades needed. To avoid extra expenses, homeowners should consider these factors.
One homeowner faced issues with their electrical outlets in an older home needing renovations. They asked multiple contractors for estimates but found discrepancies due to varied expert levels. Without expertise, one can expect fluctuation in final costs. So, should one consider DIY electrical work? Definitely Not – because risking your life for a few extra dollars doesn’t make sense.
A Wining Cost Estimate
That Helps You To Win More Electrical Construction Projects
Do It Yourself (DIY) vs. Hiring a Professional
To weigh your options on DIY vs. professional installation of electrical outlets and switches, delve into the advantages and disadvantages of hiring a professional electrician or doing it yourself. Ensure your safety during a DIY installation by following some essential safety tips.
Advantages and Disadvantages of Hiring a Professional Electrician
Professional Electrician Services vs. DIY Electrical Work
Should you hire a professional electrician or go the DIY route? It’s important to weigh the pros and cons.
Advantages:
- Professional electricians have the knowledge, skills, and training to do complex electrical work safely.
- They can spot problems and provide solutions without causing damage or harm.
- Licensed electricians offer guarantees on their workmanship.
- You avoid the risks involved with wiring, circuit breakers, fuses, and other electrical components.
Disadvantages:
- Electrical services cost more than DIY.
- Booking an electrician can take time and delay important projects.
- Some people may feel uneasy with strangers in their home or office.
- If the electrician is busy, small jobs might take longer.
Some systems require experts like an electrical engineer, such as industrial controls wiring or power supply installation. Plus, there are potential safety risks if you try DIY electrical work. In the past, there have been accidents causing injury or even death which could have been avoided with professional testing.
So, for casual operations like replacing bulbs or minor repairs of switches, DIY may be feasible. But for major projects, it’s best to leave it to the pros. DIY may save you money, but it can also lead to lots of frustration!
Get Financing For Electrical Construction Business
Maximize your electrical construction business’s potential with our competitive financing options

Advantages and Disadvantages of a DIY Installation
DIY Home Installation vs Professional Services: Pros and Cons
Homeowners often ponder between DIY and professional services. Both have their pros and cons. They should evaluate what best works for them.
Advantages of a DIY Installation:
- Cost-effective
- Control over quality
- Educational experience
Disadvantages of a DIY Installation:
- Time & effort
- Risk of costly mistakes
- May not meet industry standards
Homeowners should consider size, time, budget, and skill level before deciding between DIY or professionals.
Chris Gehler was an example of an individual who found the essence in “doing it yourself.” In 1998, he retrofitted his roof with energy-efficient tiles to save thousands on electricity annually. This inspired others to follow suit.
However, remember, hospitals are not DIY projects. So, take safety tips into account for a successful installation.
Safety Tips for DIY Installation
Installing things can be rewarding and cost-saving. But, there’s risk involved too. Here are 6 Safety Tips for DIY Installations:
- Read Instructions Thoroughly
- Wear Safety Gear
- Stay Focused & Uninterrupted
- Use Correct Tools
- Be Patient & Don’t Rush
- Turn Off Power Sources Before Electrical Work
Also, be aware of potential hazards like electric wires, chemicals, or sharp tools. These can bring serious injuries.
It’s a good idea to make a list of items needed before starting any project. Also, work in a well-ventilated place.
Don’t forget that safety comes first when doing installations. Get yourself protected from harm by following the proper safety measures.
Warning: Never attempt to install electrical outlets/switches without the right materials. It could be fatal.
A Wining Cost Estimate
That Helps You To Win More Electrical Construction Projects
Materials Needed for Installing Electrical Outlets and Switches
To know what you’ll need for installing electrical outlets and switches, look no further than this section on the materials required. This will be your go-to guide to understanding all of the materials you’ll need for installing these important features in your electrical system. The sub-sections will cover the details of what you’ll need for Electrical Outlets and Switches, Electrical Wiring Cables, and the Tools Required for the Installation.
Electrical Outlets and Switches
Electrical power outlets and control switches are must-haves for a functioning electrical system. They give access to electricity and allow you to give instructions to installed appliances.
- Make sure you get the right size and type of electrical boxes for your outlets and switches.
- Make sure you have the right-sized wires with the right insulation levels. This reduces heat loss.
- Lastly, check you have the required mounting brackets, screws, cover plates, and other accessories for installation.
Planning where to place your outlets or switches? Consider any future installs. Installing spares in strategic spots is wise. This makes it easier to add more power access points.
Pro Tip: Test the wiring after installation with an electrical tester. This ensures there are no unwanted shorts or open circuits that could damage or cause injury. Electrical wiring: avoid tangled messes like the plague!
Electrical Wiring Cables
Electrical outlets and switches need wiring cables to supply power. Pick these cables carefully and install them correctly for a safe system. A table showing wire gauge, insulation type, conductor material, and voltage capacity can help with selection. Make sure to size the wires per National Electrical Code standards – improper sizing can lead to fires. Surprisingly, electrical wiring cables have been around for centuries – the ancient Egyptians and Romans used copper wiring. Modern technology has made these inventions safer and easier to use for professionals and DIYers alike! Get set to get handy with the essential tools for electric outlet and switch installation.
Tools Required for the Installation
To get the electrical installation job done, you need the right tools. Each one serves a purpose for success. Here are some Tools Required:
- Wire Stripper – Removes insulation from wires.
- Circuit Tester – Checks if a circuit is live or not.
- Multimeter – Measures current, voltage and resistance.
Other tools may be used such as pliers, screwdrivers and power drills. Be aware, each installer will have their own set of tools. Using different types of cutting pliers can cause damage to the wires. So, always be on the lookout for any damage while completing the installation. Remember – safety comes first when dealing with electrics. Before working on outlets and switches, always turn off the power. Be sure to show off your electrical skills – but make sure it’s the outlets and switches doing the shocking, not you!
Preparation for Installation
To prepare for installation of electrical outlets and switches with the sub-sections of planning the layout, turning off power supply and measuring and marking, you need to ensure safety and efficiency. This section will cover all the measures you need to take before starting the installation process, so you can estimate the price and time required accurately.
Planning the Layout
Strategize and plan your layout for efficient installation. It saves time and resources. How?
- Measure the available space.
- Imagine what the final installation looks like.
- Draw out the plan.
- Mark cables and wires.
- Make sure your floor plans are exact.
- Take into account furniture and cabinets.
- Don’t miss out on any obstacles.
- Don’t forget to turn off the power supply! Otherwise, you’ll have to explain it to the electrician.
A Wining Cost Estimate
That Helps You To Win More Electrical Construction Projects
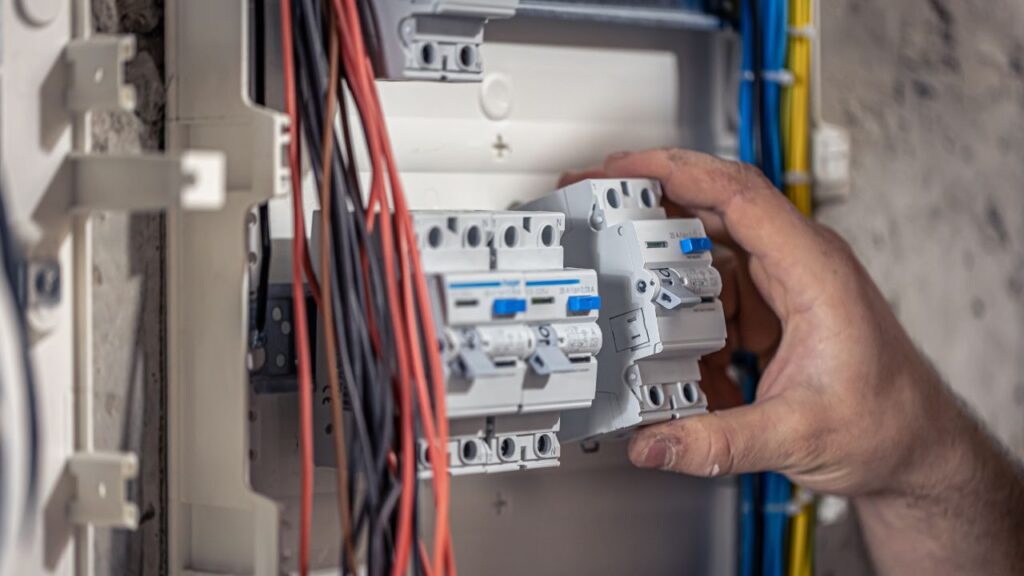
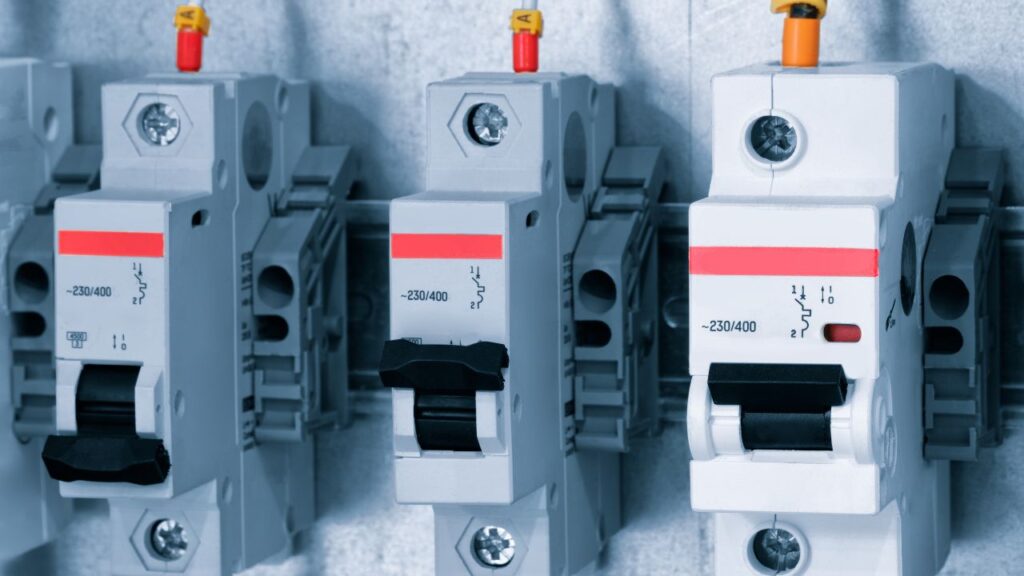
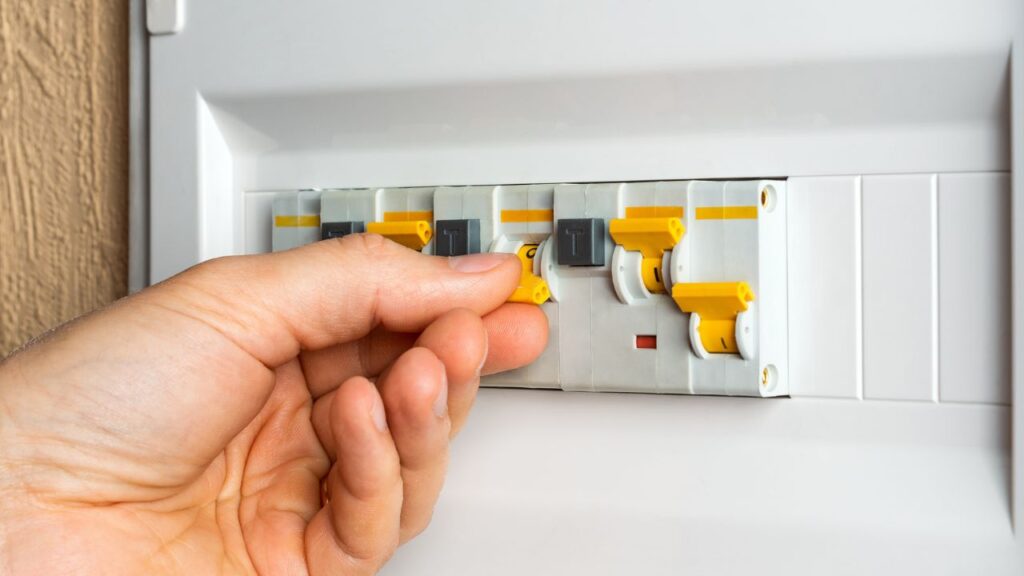
Turning off Power Supply
To ensure safety during installation, it is vital to power off the source. Shutting down the Power Supply safely is critical in avoiding any accidents and damage to equipment. So, here’s a 6-step guide to Turn off Power Supply Safely:
- Switch off all electronics connected to the circuit.
- Identify the main switch that controls the electricity supply.
- Flip the switch to the “off” position.
- If no external shut-off, unplug all cords from sockets.
- Try to turn on electronics after unplugging them to make sure there’s no power flow.
- Lock the main disconnect switch in OFF position if dealing with high voltage circuits or fuse boxes.
Label the breaker box for easy resetting if needed. Pro Tip: Always double-check before starting an installation process. Make sure wires are turned off as negligence can cause harm to humans and equipment. Make sure your measuring tape is longer than your patience when marking out the installation area.
Measuring and Marking
When getting ready for installation, it’s vital to determine proportions and mark out the space. Accurate measurements and markings are key for a successful installation. Here’s a 6-step guide:
- Read the installation instructions.
- Make sure you have the needed tools: tape measure, level, and pencil.
- Measure the length and width of the area precisely.
- Mark the area with a pencil and level for straight lines.
- Double-check measurements with the instructions.
- Clean out the marked area for a clear working space.
Don’t rush it! Mistakes can cost time and money. There’s more than just tools to consider when prepping for installation, such as weather, location, and human error. The Washington Post even reports that loud construction sounds can cause hearing loss. So, don protective gloves and follow these steps for electrical outlet installation!
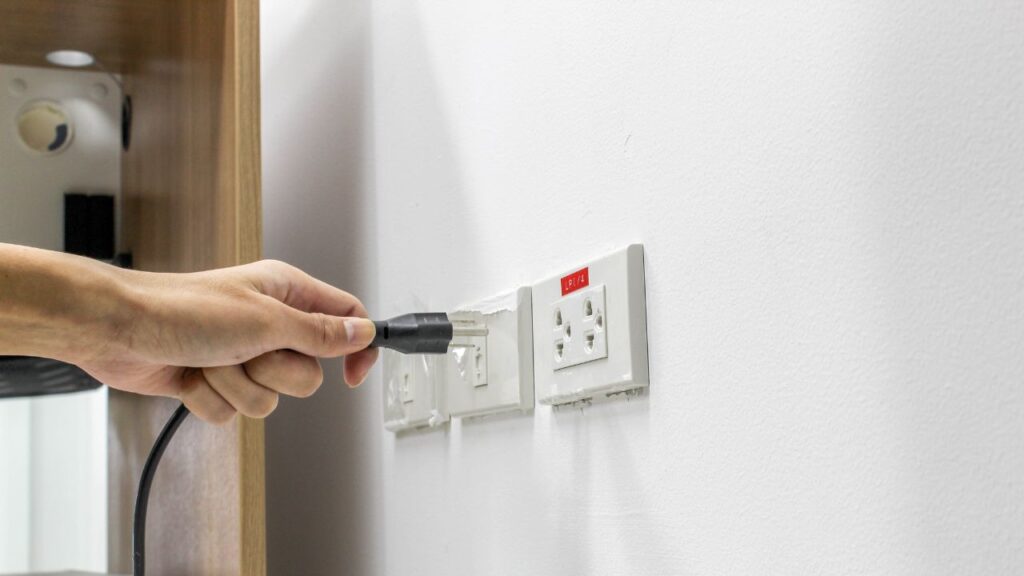
Electrical Outlet Installation Steps
To make installing electrical outlets and switches easier, here are the steps you need to take. In this section, we will guide you through the process of electrical outlet installation with three sub-sections: wiring the electrical outlet, connecting the electrical outlet, and installing the faceplate. Each sub-section will provide you with the necessary steps to complete the task at hand.
Wiring the Electrical Outlet
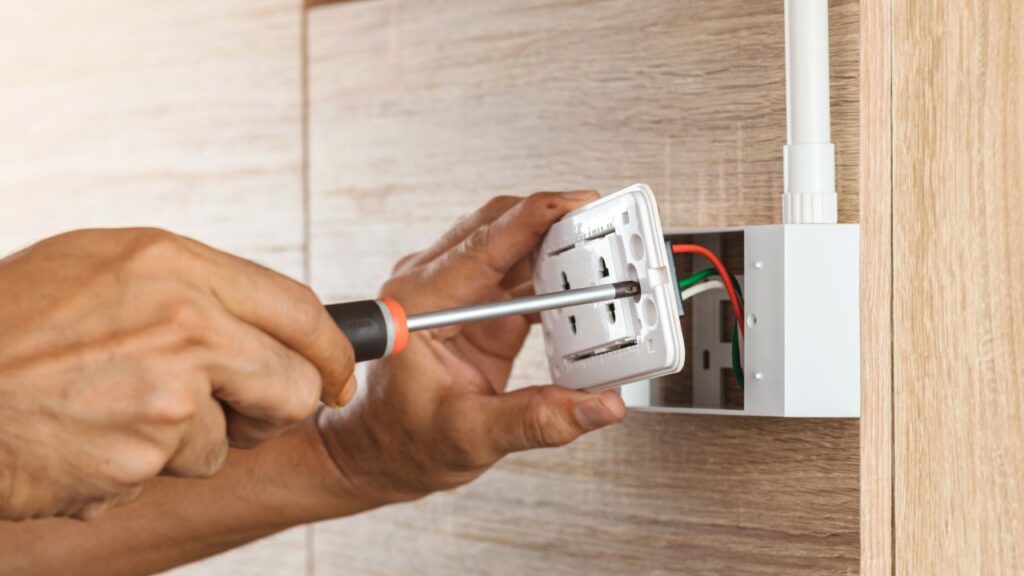
When it comes to connecting an electrical outlet, certain steps must be taken before use. This process is essential to ensure all components are working properly.
To wire an electrical outlet, follow these four steps:
- Turn off power supply at the location.
- Strip a small part of each wire’s insulation using wire strippers. Connect black wires to gold/dark-colored screws and white/neutral wires to silver screws.
- Crimp down connectors with pliers and fasten light fixtures.
- Install wall brackets with spacers if needed, and attach wall plate onto box frame.
Remember, all exposed wires need to be securely contained within each connector. Never ground an electric outlet with metal braces behind walls. Inspect wall before installing.
Suggested tips:
- Be careful when stripping wires.
- Double check all connections before turning power back on.
- Don’t replace two prongs with three-prong outlets unless electrical system is grounded.
Get set to wire your electrical outlet! It’s easy!
Connecting the Electrical Outlet
When it comes to attaching an electrical outlet, there are certain steps to take for a successful outcome. Here’s how to do it:
- Turn Off Power Supply: Before connecting the outlet, turn off the power at the circuit breaker or fuse box.
- Strip the Wires: Take ¾ inch of insulation off each wire to be connected to the outlet.
- Connect the Wires: Secure each wire to its corresponding screw terminal on the outlet, making sure they are tight and in the correct direction.
- Attach Cover Plate: Once all wires are connected, secure them with an appropriate cover plate.
It’s important to check that everything is properly secured and tightened before turning the power back on. Different outlets may have different wiring configurations based on their intended use and voltage requirements. Read instructions and guidelines for your specific electrical outlet before beginning installation.
Did you know that electrical outlets were first used in homes in the 1900s? Before this, lamps and appliances used gas or oil-based fuels for power. Putting the faceplate on is like adding the finishing touches to your electrical outlet.
A Wining Cost Estimate
That Helps You To Win More Electrical Construction Projects
Installing the Faceplate
Complete the electrical outlet installation by adding the cover plate! This covers the wiring and provides safety. To install the faceplate:
- Switch off circuit breaker or power supply.
- Remove screws, take off cover.
- Align faceplate with screw holes.
- Attach screws to fix.
- Check for wriggling cover plate or loose screws.
- Switch on power supply, test, confirm working.
Identify hot wires and neutral wires correctly. Wrong connections lead to electric shock. Energy.gov stats say over 1000 Americans electrified annually due to home-based accidents. Let’s tackle the electrifying world of Electrical Switch Installation!
Electrical Switch Installation Steps
To install your electrical switches, you need to follow a series of steps. This section on electrical switch installation steps with sub-sections on wiring the electrical switch, installing the switch box, connecting the electrical switch, and installing the faceplate will guide you through the process.
Wiring the Electrical Switch
Connecting an electrical switch? It’s important to follow the right steps, for a safe and successful installation. Here’s a three-step guide:
- Step 1: Turn off the power supply.
Turn off the circuit breaker connected to the wires you’ll be working on. - Step 2: Connect the wires.
Use pliers or Phillips head screwdriver to remove an inch of insulation from each wire. Then, connect them to their corresponding screw terminals on the switch. - Step 3: Secure everything.
Tighten all screws. Loose screws may cause issues later on.
Remember: Read through manufacturer instructions first. Have someone around for safety. Installing a switch box is not as easy as flipping a light switch. But with these steps, you can do it with confidence!
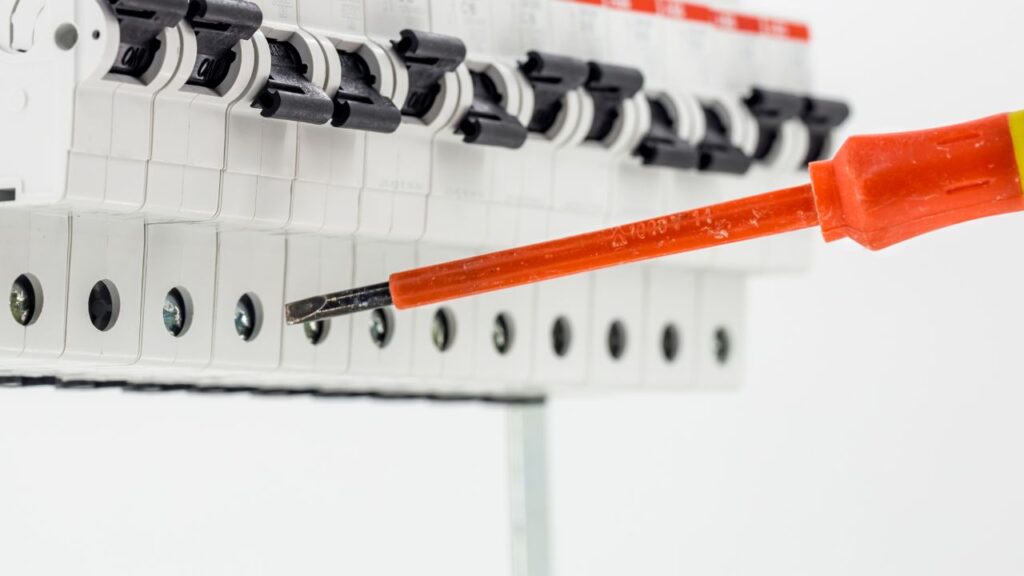
Installing the Switch Box
Time to make the switch from confusion to satisfaction as we connect the electrical switch! Here’s a professional guide on how to install the power switch:
- Turn off the Circuit Breaker – Before working, shut down the circuit and mark it with a tape, so others don’t mess up.
- Measure Switches – To know what type of box to use, measure the switches. Mount boxes with caution.
- Connect the Ground Wire – Connect the ground wire to the green screw inside the box. Use a clamp or wrap it around the screw.
- Install & Attach Wiring – Cut the wire, leaving some slack so it can be bent around the screws without tension.
- Secure Switch in Place – Tighten the screws at top and bottom to fasten switch into its box.
- Close Up & Test Circuit – Put the cover plate back and switch on the circuit breaker.
Protective gear such as gloves, goggles and clothing is a must when installing electrical switches.
Fun Fact: John Henry Holmes invented the light switch in 1884!
Connecting the Electrical Switch
Connecting an electrical switch? Safety is key! Here are the steps to ensure a secure connection:
- First, switch off the power supply to avoid shocks.
- Check the circuit and use a voltage tester to confirm no current flow.
- Carefully remove the wires from the old switch.
- Secure the wires to the new switch using screws/ lugs.
- Double-check all connections and wiring before turning on the power supply.
Safety first! Remember to be careful and patient. Else, accidents or malfunctions might occur.
It’s important to make sure the wiring is compatible with the new switch model. Failing to do so could lead to short circuits and damage.
And don’t forget to reinstall the fuse after installation! Complete each step properly before switching on the power supply. Lastly, install the faceplate and you’re done!
A Wining Cost Estimate
That Helps You To Win More Electrical Construction Projects
Installing the Faceplate
Installing a cover plate is key for the electrical switch installation process. It helps protect the wiring and switches, and adds an aesthetic finish. Follow these steps to get it done right:
- Turn off all switches to avoid any electrical hazards.
- Hold the cover plate against the wall, aligning its holes with those on the electrical box.
- Insert screws into each hole and tighten until snug – beware of over-tightening!
- Snap in any inserts or trim pieces if your switch cover design requires it.
- Wipe down the cover plate with a soft cloth to remove any fingerprints or smudges.
It’s important to install the faceplate – skipping this step could result in exposed wiring, posing greater risks of accidents. Do it right – follow each step closely for optimal results.
Troubleshooting and Common Mistakes
To troubleshoot and avoid common mistakes while installing electrical outlets and switches with estimated prices, explore the following sub-sections: testing the outlets and switches, common mistakes to avoid, and troubleshooting tips. These will ensure that your installations run smoothly and without errors.
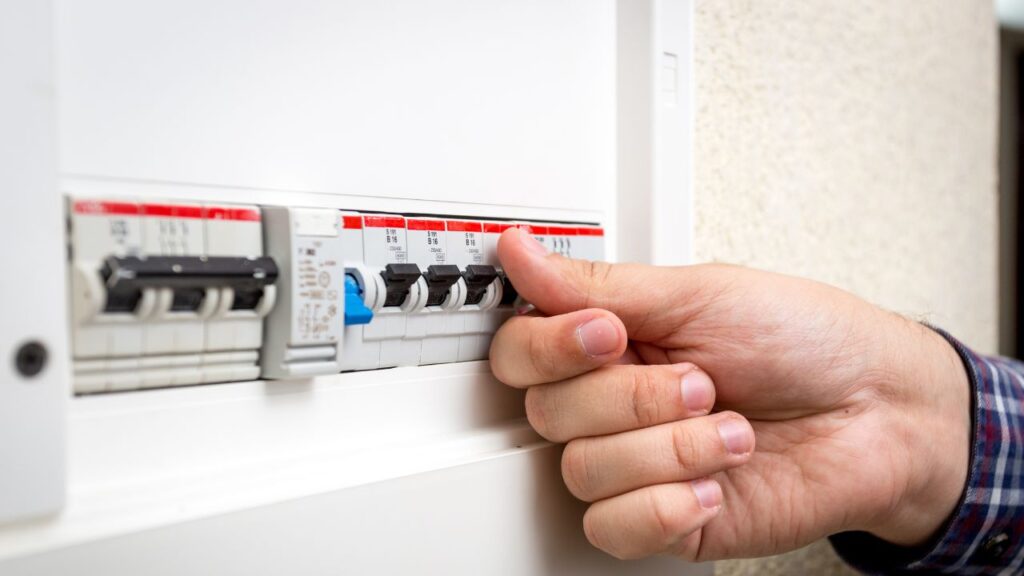
Testing the Outlets and Switches
Test your electrical outlets and switches regularly to avoid electrical disasters. Here’s a basic guide:
- Switch off the circuit breaker, turning off the power supply
- Use an outlet tester or multimeter to detect any electrical issues
- Insert the tester until it clicks – record the findings
- If experienced with electrical work, remove the outlet cover and examine wires. Tighten them as needed.
- Replace damaged, worn-out or old wires, outlets, plugs, cords etc. for safety.
To stay safe, conduct regular tests of all electrical components. Short circuits cause more residential fires than arson, according to a FEMA study. Ignorance is often mistaken for confidence when troubleshooting. Be careful!
Common Mistakes to Avoid
Be Careful: Common Traps to Avoid!
Wrong troubleshooting can lead to pricey and time-consuming blunders. To stay clear of these, it’s important to be aware of common traps.
For example:
- Not researching properly before attempting a solution.
- Not backing up files or not backing up often enough.
- Ignoring user reports or feedback.
A key part of any successful troubleshooting plan is paying attention to details. This is especially vital when facing new difficulties or tech.
One professional saw how team-work makes a difference. One member identified the issue, while another went right to the source and quickly fixed it, saving valuable company hours.
If at first you don’t succeed, try troubleshooting again!
A Wining Cost Estimate
That Helps You To Win More Electrical Construction Projects
Troubleshooting Tips
Discover & Resolve Issues: A Guide
Tackling technical errors? Here are five helpful tips to get you out of a jam:
- Look for patches that might fix the issue.
- Reboot your device or app.
- Remove and reinstall the troublesome software.
- Erase cache or temporary files that could be causing errors.
- Run virus & malware scans for security.
Still stuck? Don’t hesitate to contact customer support or a pro.
Pro Tip: Note down any error messages. They could help when getting advice.
If all else fails, blame the printer guy!
Conclusion
The analysis shows that the cost of installing electric switches and outlets differs. It depends on the type of installation, where it is, what the occupant wants, and the price the electrician charges. Homeowners must remember these factors when working out the cost.
Number of outlets is a big factor. For example, lots of outlets will cost more than a few. Electricians also have different costs depending on their experience and local regulations. So, in different areas, similar jobs could cost different amounts.
Labor costs are usually a large part of the total cost. So, hiring an electrician with experience can save money and make sure the job is done well. Simple things like changing an old outlet can be cheaper than big projects like wiring walls.
Pro Tip: Do your research on electrician costs in your area before choosing one. This will help you get a good price.
FAQs
The cost to install a new electrical outlet can vary depending on factors such as the location of the outlet, the wiring required, and the complexity of the installation. On average, homeowners can expect to pay between $100 and $200 per outlet.
While it is possible for homeowners to install electrical outlets themselves, it is generally not recommended. Electrical work can be dangerous and any mistakes can lead to serious injury or damage to your home. It is always best to hire a licensed electrician to ensure the job is done safely and correctly.
The number of electrical outlets that can be installed on one circuit depends on the amperage of the circuit and the wattage of the devices that will be plugged into the outlets. In general, it is recommended to install no more than eight outlets on a 15-amp circuit or 10 outlets on a 20-amp circuit.
It depends on your local building codes and regulations. In many areas, a permit is required to add new electrical outlets to your home. It is important to check with your local authorities before beginning any electrical work to ensure that you have the appropriate permits and are following all applicable regulations.
The time it takes to install an electrical outlet can vary depending on the complexity of the installation and the location of the outlet. On average, it can take anywhere from 1-3 hours to install a new electrical outlet.
Yes, electrical outlets can be installed in outdoor areas. However, they must be specifically designed for outdoor use and must be installed in a weatherproof housing to protect them from the elements.
Process To Get Electrical Construction Cost Estimate Report
Here I am going to share some steps to get your electrical construction cost estimate report.
-
You need to send your plan to us.
You can send us your plan on info@estimatorflorida.com
-
You receive a quote for your project.
Before starting your project, we send you a quote for your service. That quote will have detailed information about your project. Here you will get information about the size, difficulty, complexity and bid date when determining pricing.
-
Get Estimate Report
We do electrical construction cost estimating and prepare a detailed report for your project. At last, you finalize the report and finish the project.