A Step-by-Step Guide to Estimating the Cost of Painting Ceilings Prep Priming and Finishing
Factors to Consider Before Painting Ceilings
To accurately estimate the cost of painting your ceilings, you need to consider various factors. In order to achieve a flawless finish and save on costs, you should start with proper preparation, priming, and finishing. This section focuses on the factors that you should take into account before painting your ceilings. These factors include ceiling height and size, ceiling condition and repair needs, and ceiling material and texture.
Ceiling Height and Size
When painting ceilings, many factors should be considered. For instance, the size and height of the ceiling. See the table below for tips.
Ceiling Height\Size | Small (<100 sq ft) | Medium (101-400 sq ft) | Large (>401 sq ft) |
|---|---|---|---|
Low (<8 feet) | White reflects light. | Use pale colors to look bigger. | Different shades add depth. |
Standard (8-10 feet) | Lighter shades make it appear larger. | Bold colors give dramatic effect. | Two-tone colors add interest without overwhelming. |
High (>10 feet) | Bold, dark colors create intimacy. | Deep, eye-catching colors to lower ceilings. | Paint beams or crown molding for visual interest. |
In addition, one should always prepare before painting – this includes cleaning, fixing cracks and holes, and protecting floors and objects.
Pro Tip: Use quality paint rollers and extension poles made for ceilings for easier tasks and professional results. Lastly, if your ceiling needs repair, do it before painting!
Ceiling Condition and Repair Needs
When it comes to painting your ceiling, certain measures must be taken. It is important to check the condition and any repair needs of the ceiling, as these can affect aspects like texture and adhesion.
You must inspect your ceiling closely. Look for stains, holes, cracks, peeling paint or layers of old paint. Fixing these before applying paint will help achieve a long-lasting, aesthetically pleasing outcome.
Neglecting repair needs can lead to unexpected expenses. Also, inspecting your ceiling could identify issues such as water damage or mould buildup, which could worsen over time.
Considering all these points is very important. A little due diligence before starting your ceiling painting process will save you a lot of trouble later. The right material and texture of your ceiling is like finding good underwear – essential but better not seen.
Ceiling Material and Texture
Ceiling Composition and Consistency
When painting, the material and texture of the ceiling is important. It affects how much paint is needed, how it sticks, and how long it lasts.
- Porosity: The capacity of the ceiling to absorb moisture is called porosity. High porosity ceilings may need extra coats of paint.
- Texture: Ceiling texture can be smooth or rough. This will affect the paint look on the surface.
- Age: The age of the ceiling can influence preparation before painting.
- Type: Ceilings in different areas, like bathrooms with humidity, may be different.
- Patchwork: Patches must be addressed prior to painting.
Priming certain surfaces may be necessary before painting. Get professional advice if uncertain.
It’s best to clean and prime surfaces for great adhesion before starting any paint job.
By considering ceiling material components/consistency before beginning a paint project, it saves time and ensures professional-looking results that last. So, get ready to prepare the ceiling for a makeover!
Prepping the Ceiling for Painting
To prep your ceiling for painting with seamless results, you need to start with a solid foundation. In this section, “Prepping the Ceiling for Painting,” we will guide you through the necessary steps to ensure your paint job looks professional and lasts. We’ll cover the sub-sections of cleaning the ceiling surface, sanding and smoothing rough spots, covering and protecting surfaces and furniture, and taping and trimming.
Ceiling Height and Size
Before you start painting your ceiling, clear the dust, dirt, and cobwebs off its surface. Here’re 5 steps to help you do it right:
- Use a soft-bristled brush to take away any settled debris.
- Protect the floor and furniture with drop cloths or plastic sheets.
- Soak a sponge in warm soapy water. Wring out any extra water.
- Start wiping the ceiling in small sections, overlapping each one.
- Rinse the sponge in clean water and keep repeating until the entire ceiling is done.
Using a vacuum cleaner with an extended hose is great for high ceilings. Check for stains or marks before priming or painting. Have a ceiling as smooth as a baby’s bottom! Prepare properly before painting for great results.
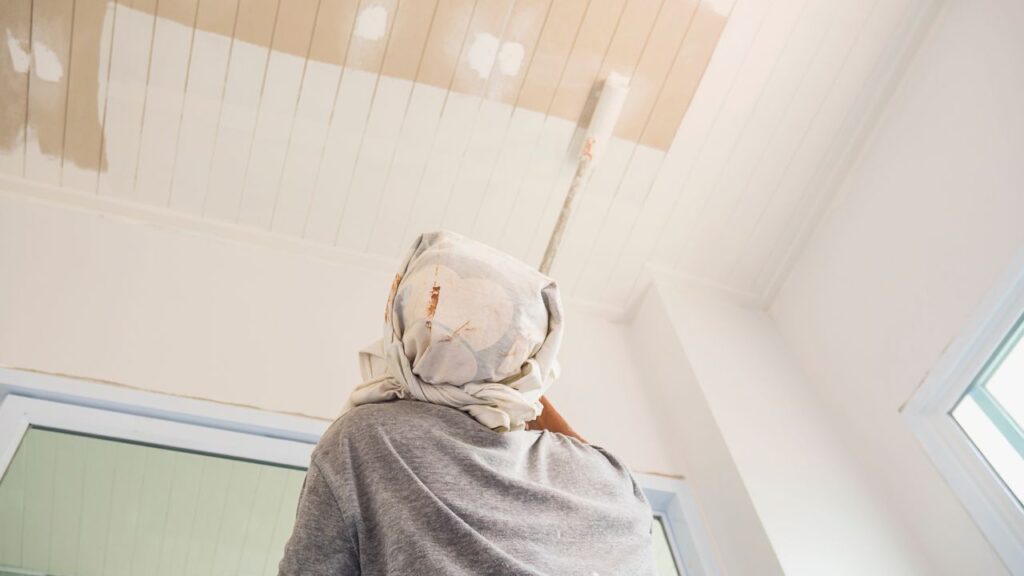
Sanding and Smoothing Rough Spots
In order to obtain a polished ceiling, you must prep the surface before painting. This includes removing any bumps or imperfections. Sanding and smoothing out the roughness is a necessary step. For a flawless finish, follow these 5 steps:
- Check if there are any rough spots by running your hand over the surface.
- Use sandpaper or a sanding block to rub gently in a circular motion over each spot until it’s even.
- Switch to finer-grit sandpaper and keep smoothing until the whole ceiling is even.
- Vacuum or wipe the dust from the ceiling with a cloth.
- Clean the surface with a damp cloth for a spotless finish.
When performing this task, remember to wear protective gear such as gloves, goggles and a respirator. Sanding creates dust, which can be hazardous to your health.
Applying primer after patching up will provide an excellent base for the paint. This will also prevent future cracking or peeling issues.
Though many homeowners do not focus on prepping, it ensures aesthetic success as well as durability. Preparing the surface enhances paint adherence and extends the life of the paint.
Sandpaper has been used by humans since ancient times. The Chinese used crushed seashells mixed with oils to polish wood items. Then, in 1450 AD, Johannes Gutenberg used emery paper to engrave copper sheets in Europe. Sandpaper soon became a standard tool for craftsmen.
Protecting surfaces and furniture during painting is important – messy, but necessary.
A Wining Cost Estimate
That Helps You To Win More Painting Construction Projects
Covering and Protecting Surfaces and Furniture
To paint a room immaculately, protect surfaces & furniture from harm. Here are tips to cover & safeguard them:
- Fabric drop cloths instead of plastic are more durable & slip-resistant.
- Cover floors, countertops, cabinets, & fixtures.
- Move furniture to the centre & cover with drop cloths or plastic sheets.
- Put painters tape along edges & around light switches, electrical outlets, door handles etc.
- Keep pets & children away; open windows for ventilation.
Remember: good preparation yields better results. Take time to prepare before painting. For neat ceiling painting, use an extension pole, not step ladders.
Follow these tips to avoid costly mistakes like splattering paint drops on surfaces & furniture. Get an arm workout taping the edges of your ceiling for hours!
Taping and Trimming
Preparing surfaces is key for a smooth paint job. This section gives the necessary steps of masking and cutting-in.
- First, use painter’s tape to protect areas like moldings, windowsills, and doorframes from drips or marks.
- Next, put brush or painter’s tool in paint and scrape off any excess.
- Start at a corner of the ceiling, move your brush along the edge and cut-in all around.
- Smooth out the paint with a dry tool along the edges and surfaces. Avoid leaving blobs of paint with a brush. Use quality materials such as painter’s tape which bonds well without peeling or lifting.
Cutting-in can be hard, but do it step-by-step and avoid smeared lines and time-consuming corrections. As a pro painter, I recall my first time cutting edges. It was tough to keep even pressure on all curves. I made it easier over time by prepping well. Good luck and happy painting! Get ready to feel like a pro or just call it modern art.
Priming the Ceiling
To ensure a successful ceiling painting project, priming the ceiling is essential. With “Priming the Ceiling” as your focus, this section will discuss the top reasons as to why priming is an important step in your painting routine. In addition, you will discover the different types of primer that you can use, as well as the best techniques to apply it, found in our sub-sections: Importance of Primer, Types of Primer, and Application Techniques.
Importance of Primer
Priming is a key step in any painting project. It serves as a barrier between the surface and the paint, allowing for better adherence and coverage. The right primer must be selected for the material type.
Before applying the primer, the surface must be clean and smooth. Oil-based primers are recommended for metal surfaces, while wood and drywall require water-based or shellac-based primers. Once applied correctly with brushes or rollers, the primer should be given adequate time to dry before painting.
Priming has been an important part of art since centuries ago, with masters such as Leonardo da Vinci and Michelangelo Buonarroti. Primer diversity is the key to great works that will last a long time!
Types of Primer
When you paint, using primer is essential. It ensures the topcoat sticks and covers well. Different types of primer are available for different surfaces such as wood, metal or drywall. Check the table below for more info.
Surface Type | Primer Type |
|---|---|
Wood, metal, masonry and plaster | Oil-based primer |
Drywall and bare wood surfaces | Water-based primer |
Woodwork, ceilings, plaster and metal | Shellac-based primer |
Oil-based primer is good for wood, metal, masonry and plaster. It seals stains and prevents them from bleeding through. It also gives excellent adhesion and stain resistance. Plus, it dries faster in humid conditions.
Water-based primer is for drywall and bare wood surfaces. It covers small imperfections and evens out porous surfaces. It’s easy to clean up with soap and warm water. There’s no strong odors or fumes during application, and it has a quick drying time.
Shellac-based primer is for woodwork, ceilings, plaster and metal. It blocks stubborn stains, like water damage or smoke stains, from leaking through. Plus, it dries quickly and sands easily. It also has superior adhesion properties on smooth surfaces like glass or tile.
Some primers have specialized uses, like stain-blocking or rust-inhibiting abilities.
Before applying any type of primer, make sure the surface is clean and free of debris. Also, use sandpaper to rough up any glossy surfaces. This will help the primer adhere better.
Choose a high-quality primer for an even coverage of paint on top and to reduce the number of coats needed. Always follow manufacturer directions for best results. To have a flawless ceiling, mastering application techniques is key.
A Wining Cost Estimate
That Helps You To Win More Painting Construction Projects
Application Techniques
For priming the ceiling, there are various techniques to choose from. These include using a roller, brush, or spray. Each technique has pros and cons – size of area and personal preference should be assessed before deciding.
Rollers with thick nap are recommended for better coverage and even coating. Brushes are slower but provide control over the amount of primer applied. Spraying is quick but needs experience to avoid overspray and uneven patches.
Choosing the right application technique is important for the final product. To get the most out of it, practice on a small area first. Take caution when selecting a method, as it can impact health if materials are not properly contained. Plus, painting the ceiling takes major arm strength – so do your push-ups!
Painting the Ceiling
To estimate the cost of painting your ceilings effectively, you need to make informed decisions about various factors. In this section, “Painting the Ceiling,” we’ll explore the key considerations to make for an efficient and cost-effective outcome. We’ll also introduce the four sub-sections to keep in mind: choosing the right paint, application tools and techniques, applying multiple coats, and drying time.
Choosing the Right Paint
When painting a ceiling, the type of paint used can have a big effect on the outcome. Here’s what to keep in mind:
- Quality: Always get high-quality paint for long-lasting results and better coverage.
- Finish: Choose flat or gloss based on preference and practicality. Flat hides imperfections, while gloss is easy to clean.
- Color: Ceiling color affects the whole room’s atmosphere. Lighter shades make rooms look bigger, while darker shades create drama.
- Texture: Adding texture to the ceiling gives it a unique look and hides damage.
Plus, consider ventilation, temperature, and humidity when painting. And, buy paint from reliable sellers for guaranteed quality.
Pro Tip: Avoid petroleum-based paints as they emit toxins that can harm health. Instead, choose water-based paints made from natural materials.
And don’t forget to pick the right brush!
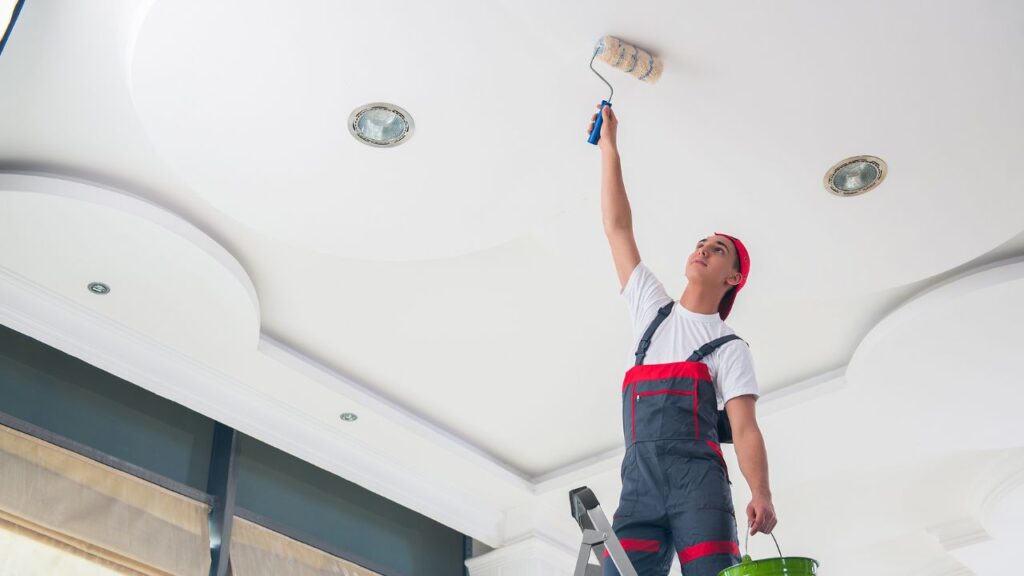
Application Tools and Techniques
To paint a ceiling properly, it’s important to use the right tools and techniques. You’ll need a paintbrush, roller and extension pole. Apply the paint in long strokes parallel to the longest wall in the room. To get a consistent finish, work in small sections.
Also, be sure to read the manufacturer’s instructions for both the materials and safety precautions. Sometimes, applying multiple coats of paint takes extra effort.
Get Financing For Painting Construction Business
Maximize your painting construction business’s potential with our competitive financing options

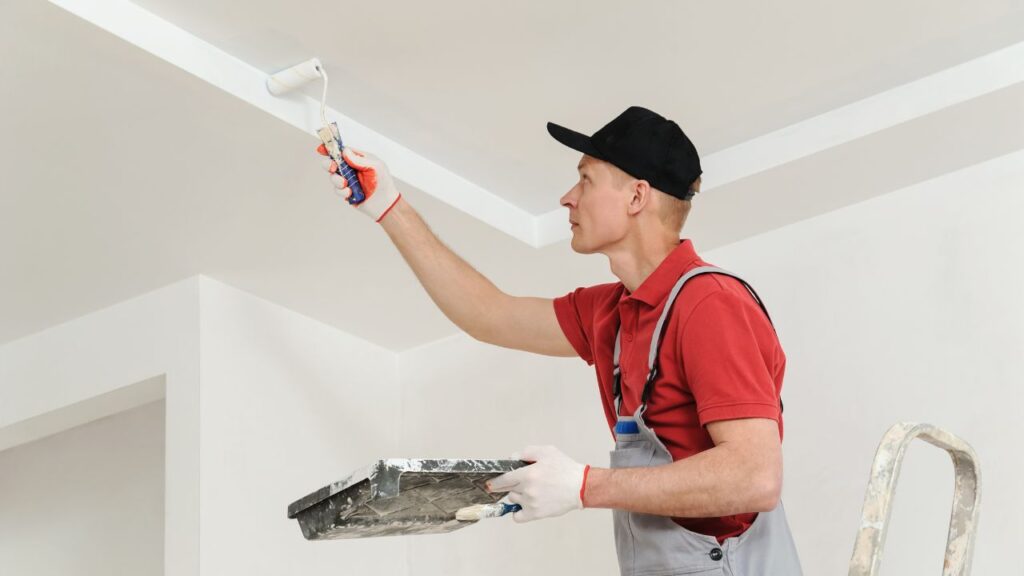
Applying Multiple Coats
When it comes to painting, coats are key for an impeccable finish. To get there, you must follow these 6 steps:
- Make sure your surface is clean and dry.
- Start with a thin base coat with a brush or roller.
- Use a fine-grit sandpaper to smoothen any flaws. Then, wipe down the area.
- Apply heavier paint applications for each coat. Let each layer dry before moving on.
- If needed, repeat step 3 before applying the next layer.
- Finish with a protective topcoat after drying overnight.
To maximize results, use high-quality paint that will last. Also, make sure to have good ventilation and give each layer sufficient drying time. This will stop bumps and bubbles in the ceiling. Patience is a virtue when perfecting multiple coats. If needed, take breaks. And don’t forget to stare at the ceiling until it’s dry!
Drying Time
When painting the ceiling, the time it takes for the paint to dry is very important. Environmental conditions, thickness of the coat, and type of paint all affect drying time.
Water-based and oil-based paints have different drying times. Humidity slows drying, while warm temperatures speed it up. Flat paints usually take 2-4 hours, and glossy paints may require 6 hours or more.
Curing time should not be confused with drying time. Even if the paint feels dry after a few hours, it may need days to harden completely. To speed up drying and get better results, dilute extra coating instead of over-thickening.
And if you want to add something special, don’t forget: glitter is always a great choice!
Finishing Touches
To add the final touches to your newly painted ceiling, follow these steps. After completing the painting process as explained in the previous sections, move on to this section “Finishing Touches”. Here, we will discuss three sub-sections: removing tape and trimming, cleaning up, and inspecting the finished ceiling. Each of these sub-sections plays a crucial role in ensuring that your painted ceiling looks perfect.
A Wining Cost Estimate
That Helps You To Win More Painting Construction Projects
Removing Tape and Trimming
Pieceing it Together: Removing Tape and Trimming
When assembling a project, removing tape and trimming excess materials are essential. Precision is key to stand-out results. Step by step:
- Gently Peel Tape: Carefully take off any adhesive tapes used during the project. Move slowly to avoid damage.
- Clean Edges: After tape removal, check for jagged edges or burs. Trim with scissors or a blade.
- Straighten Cuts: See if there are any misaligned cuts or rough edges that can be improved.
- Wipe Residue: Finish with a clean cloth to remove adhesive residue and dust particles.
Check your work carefully before displaying it. Neglecting the small details will lead to an incomplete result.
Did you know tape removal was not always part of the plan? In the past, visual aesthetics were not as important. But, with technology and market demands for perfection, tape removal is essential for a pleasing product.
Clean up is like trying to erase a crime scene, except instead of a murder weapon, it’s just a few paint cans and scattered screws.
Cleaning Up
Tidying Up
It’s key to tidy up after completing a task! Get rid of unnecessary items. Put the rest in order. This saves time and boosts productivity. Wipe down surfaces afterward. Keep it clean and limit germs.
Create a system for organization and maintenance. Have cleaning supplies close by. Make regular cleanings part of your routine.
Label bins when disposing of waste materials. Follow protocol. This will keep the workspace tidy and safe. Inspecting the ceiling is like looking for Waldo, except Waldo is a flaw. And you don’t even know if you’re in the right book!
Inspecting the Finished Ceiling
It’s essential to carefully examine the newly installed ceiling. Look over every inch, ensuring there aren’t any bumps, dents, or cracks. Make sure the paint finish is even. Also, check the lighting fixtures to see if they are working and fitted the right way. Verify the wiring connections and the clearance heights, making sure nothing is blocking them. Lastly, inspect structural support elements such as beams and joists, if available.
A single problem in the ceiling can ruin your plans. Recently, there were small cracks on a newly-painted ceiling because the old coverings weren’t removed properly. Doing inspections beforehand saved time and money, as repairs would have been needed after settling in.
FAQs
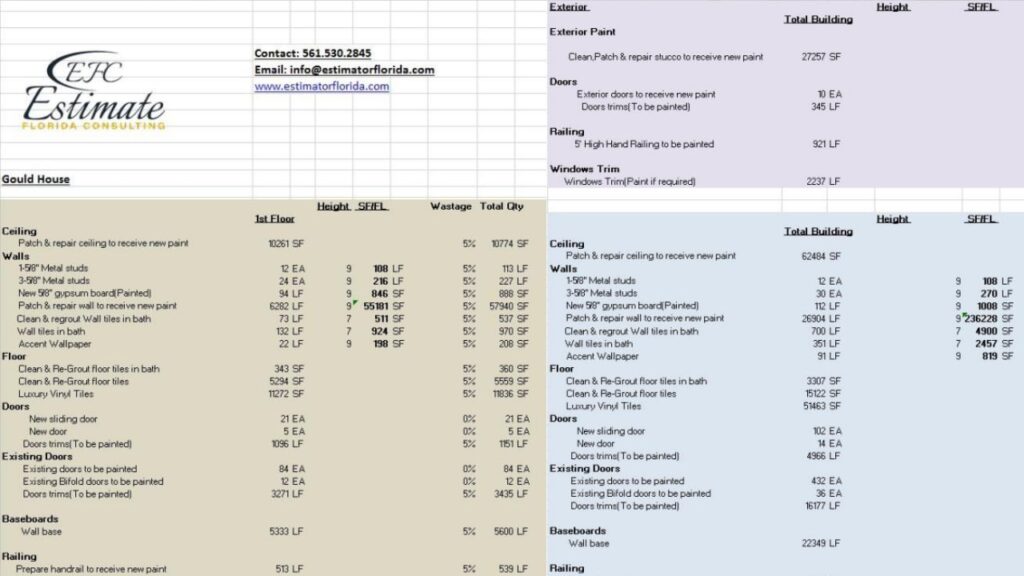
The first step in estimating the cost of painting ceilings is to measure the surface area of the ceiling. This will help you determine how much paint you will need and how long the project may take.
Yes, it is recommended to prime the ceiling before painting. This will help to ensure even coverage and a smooth finish.
Before painting the ceiling, it is important to clean the surface thoroughly and repair any cracks or holes. You may also need to cover furniture and floors to protect them from paint splatters.
It is recommended to use a paint specifically designed for ceilings, which typically have a flat finish and are formulated to resist drips and spatter.
Depending on the color and condition of the ceiling, you may need one or two coats of paint to achieve the desired coverage and finish.
It is possible to paint the ceiling yourself, but it can be a tricky and time-consuming job. If you are not comfortable with the process, it may be best to hire a professional to ensure a high-quality finish.
Process To Get Painting Construction Cost Estimate Report
Here I am going to share some steps to get your painting construction cost estimate report.
-
You need to send your plan to us.
You can send us your plan on info@estimatorflorida.com
-
You receive a quote for your project.
Before starting your project, we send you a quote for your service. That quote will have detailed information about your project. Here you will get information about the size, difficulty, complexity and bid date when determining pricing.
-
Get Estimate Report
We do painting construction cost estimating and prepare a detailed report for your project. At last, you finalize the report and finish the project.