How to Install Radiant Floor Heating in a Concrete Slab?
Installing radiant floor heating in a concrete slab is an effective way to provide consistent warmth and enhance energy efficiency in your home. Radiant floor heating systems use the principle of heat radiation to warm floors, which then distribute heat evenly across the room. This method not only provides a comfortable environment but also enhances energy efficiency. This guide will walk you through the detailed steps needed to successfully install a radiant floor heating system in a concrete slab, ensuring you understand each step thoroughly to achieve a successful installation.
Benefits of Radiant Floor Heating
Energy Efficiency
Radiant floor heating is highly energy-efficient because it delivers heat directly to the floor and objects in the room. Unlike forced-air systems that can lose heat through ductwork, radiant heating minimizes energy loss. This system allows you to keep your thermostat at a lower setting while still maintaining a comfortable indoor temperature, leading to significant energy savings. Additionally, radiant systems often allow for zoned heating, enabling you to heat specific areas of your home more efficiently. The energy savings over time can be substantial, making this an economically wise choice in the long run.
Comfort
One of the main advantages of radiant floor heating is the comfort it provides. The system distributes heat evenly across the floor, eliminating cold spots and drafts. Walking on a warm floor is particularly pleasant during the colder months. Unlike traditional heating systems, radiant floor heating operates silently, adding to the comfort of your living space without the noise of blowing air or creaking radiators. Furthermore, the even distribution of heat helps maintain a stable indoor temperature, which can be particularly beneficial for those with health conditions sensitive to temperature fluctuations.
Improved Air Quality
Since radiant floor heating doesn’t rely on blowing air, it doesn’t circulate dust, pollen, or other allergens throughout your home. This leads to improved indoor air quality, which is beneficial for people with allergies or respiratory issues. The absence of forced air circulation also means there are fewer drafts, making for a more stable and comfortable indoor environment. Additionally, radiant heating can help reduce the spread of germs and bacteria, which can be a concern with forced-air systems that blow air throughout the house.
Planning and Preparation
Determine Heating Requirements
Before you start the installation, it’s essential to calculate the heating requirements for your space accurately. This involves performing a heat loss calculation to determine the amount of heat needed to maintain a comfortable temperature. Factors to consider include room size, insulation levels, window sizes, and local climate conditions. Consulting with a heating professional or using online heat loss calculators can help ensure you select a system with the appropriate capacity for your home. Proper planning at this stage is crucial to ensure the efficiency and effectiveness of the heating system.
An accurate assessment will help avoid over-sizing or under-sizing the system, both of which can lead to inefficiencies and higher costs.
Select the Heating System
There are two primary types of radiant floor heating systems: electric and hydronic (water-based). For a concrete slab installation, hydronic systems are generally more cost-effective and efficient, especially for larger areas. Hydronic systems use a network of tubes to circulate warm water, providing even and consistent heat. These systems can be powered by various heat sources, including boilers and water heaters. The choice of system will depend on factors such as installation cost, operating cost, and the specific heating needs of your home. Hydronic systems are particularly suitable for homes with existing boiler systems or those that can benefit from the efficiency of water-based heating.
Gather Materials and Tools
To install radiant floor heating in a concrete slab, you’ll need a variety of materials and tools:
- PEX Tubing: Flexible tubes for circulating warm water throughout the system.
- Insulation Boards: Prevent heat loss downward and ensure efficient upward heat distribution.
- Vapor Barrier: Prevents moisture from seeping through the concrete, protecting the insulation and tubing.
- Manifold System: Distributes water to different zones of the heating system, allowing for individual control.
- Zip Ties or Clips: Used to secure the tubing in place, ensuring it stays in position during the concrete pour.
- Concrete Mix: The material for the slab, chosen for its thermal conductivity and suitability for radiant heating.
- Concrete Pump or Mixer: Equipment needed to mix and pour the concrete accurately.
- Tools: Tape measure, utility knife, staple gun, rebar or wire mesh, level, and a PEX cutter.
Having all the necessary materials and tools ready before starting the installation will help streamline the process and prevent delays. It is also essential to familiarize yourself with the installation process and the function of each component to ensure a smooth and efficient installation. Proper preparation can significantly impact the overall success and efficiency of the heating system.
Step-by-Step Installation Process
1. Prepare the Subfloor
Start by ensuring the subfloor is clean, level, and free of debris. A well-prepared subfloor is critical for the effective installation of the heating system. Install a vapor barrier over the entire subfloor to prevent moisture from seeping through the concrete. The vapor barrier should cover the entire floor area, with seams overlapped and sealed to prevent any moisture intrusion. Proper installation of the vapor barrier protects the insulation and the heating system from potential moisture damage, ensuring the longevity and efficiency of the system. Make sure the barrier is installed smoothly and securely to avoid any gaps or overlaps that could compromise its effectiveness.
2. Install Insulation
Place insulation boards or panels over the vapor barrier to direct heat upwards into the room and prevent it from escaping downwards. The insulation should be thick enough to provide adequate thermal resistance, typically at least 2 inches thick for optimal performance. Secure the insulation in place using adhesive or mechanical fasteners. Insulation is crucial for maximizing the efficiency of the heating system by directing the heat upwards into the living space rather than losing it into the ground. Proper insulation also helps reduce energy consumption and operational costs. Ensure the insulation is installed uniformly across the entire area to prevent heat loss and ensure even heat distribution.
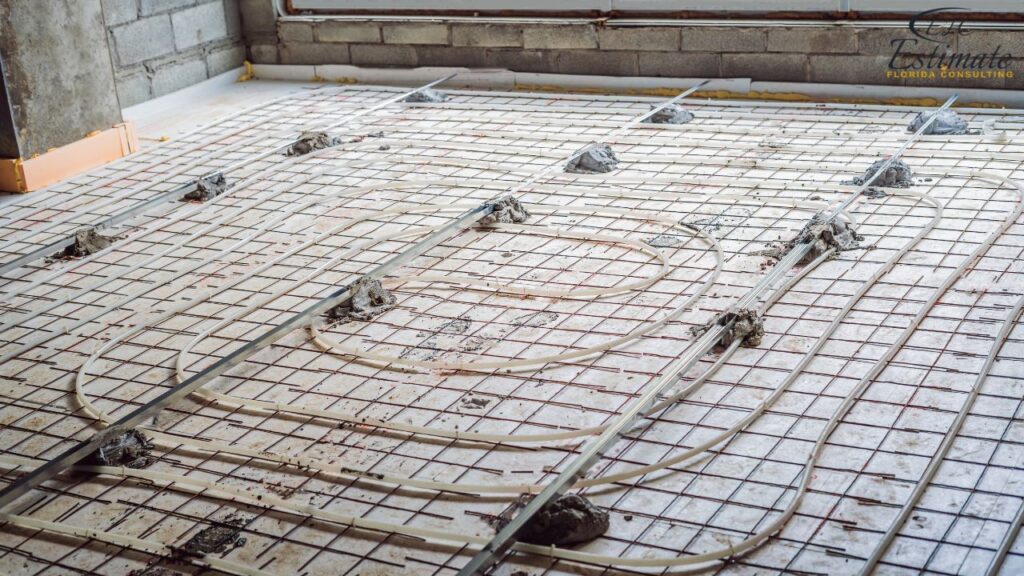
3. Lay Out the PEX Tubing
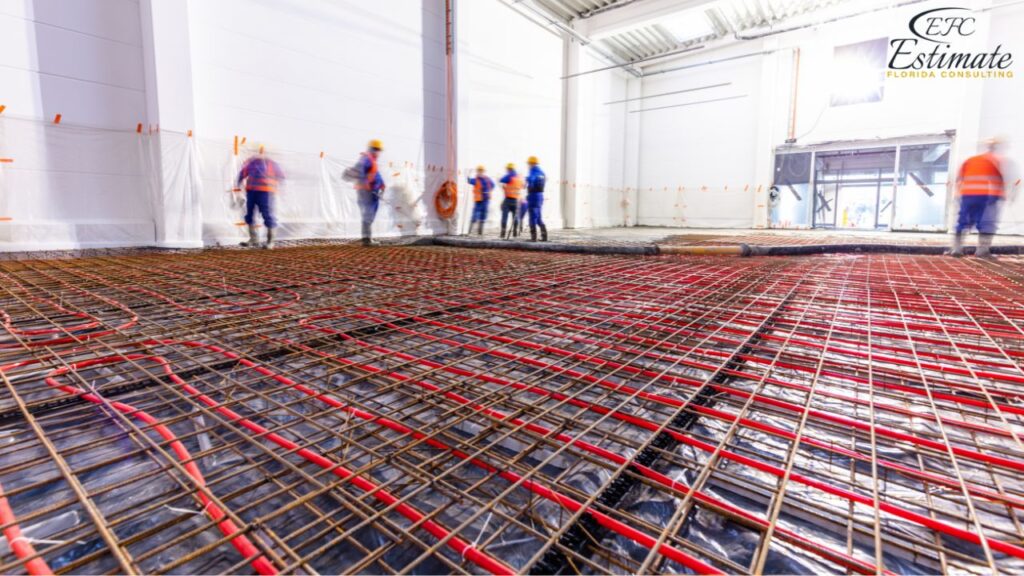
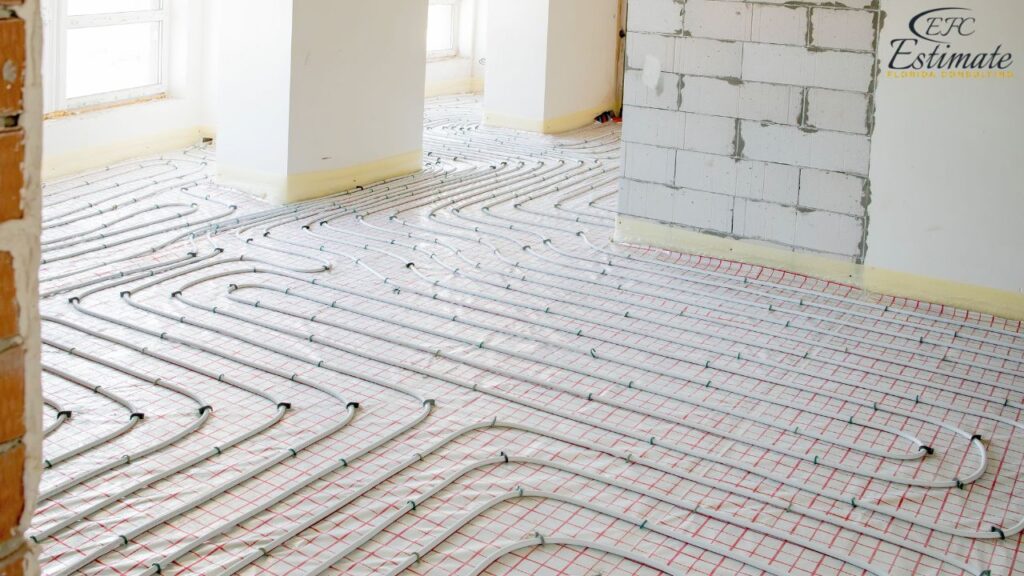
Unroll the PEX tubing and lay it out according to your heating plan. The tubing should be spaced evenly, typically 6-12 inches apart, depending on your heating needs. Secure the tubing to the insulation or rebar using zip ties or clips. Make sure to avoid kinks and sharp bends, as these can restrict water flow. When laying the tubing, ensure it follows the designed pattern, whether it’s a serpentine or spiral layout, to ensure even heat distribution. Consistent spacing and secure attachment of the tubing are essential for the efficient operation of the system. Take your time to carefully plan and execute this step, as it will directly impact the performance and efficiency of your heating system.
Tips for Laying PEX Tubing:
- Start from the Manifold Location: Begin laying the tubing from the manifold location and work your way outward. This ensures you have enough tubing to reach all areas and can return to the manifold without running short.
- Use a Serpentine or Spiral Pattern: These patterns help ensure even heat distribution across the floor. The serpentine pattern is easier to install but may result in slightly uneven heating, while the spiral pattern provides more uniform heating.
- Maintain Consistent Spacing: Consistent spacing between the tubing runs is crucial for uniform heating. Use spacers or a template to ensure even spacing. This will help maintain the desired temperature throughout the entire floor area.
Download Template For Radient Floor Heating Project Breakdown
- Materials list updated to the zip code
- Fast delivery
- Data base of general contractors and sub-contractors
- Local estimators

4. Install the Manifold System
The manifold system is the control center for your radiant floor heating system, connecting the PEX tubing to the heat source and allowing for control of water flow through each loop of tubing. Mount the manifold on a wall or in a dedicated manifold cabinet near the heat source. Connect each loop of PEX tubing to the manifold using appropriate fittings and secure them tightly to prevent leaks. The manifold should have individual controls for each loop, allowing you to balance the system and adjust flow rates as needed. Proper installation of the manifold system ensures efficient operation and easy maintenance of the heating system. Ensure all connections are secure and properly labeled for easy identification and maintenance.
5. Pressure Test the System
Before pouring the concrete, it’s essential to pressure test the system to ensure there are no leaks. Fill the system with water and pressurize it according to the manufacturer’s specifications. Monitor the pressure for at least 24 hours to confirm that there are no leaks. If any leaks are detected, repair them before proceeding with the concrete pour. Pressure testing is crucial to identify and fix any potential issues that could compromise the efficiency and integrity of the heating system once it is embedded in concrete. This step ensures that the system is leak-free and ready for concrete pouring, preventing costly repairs and potential damage to the structure.
6. Pour the Concrete
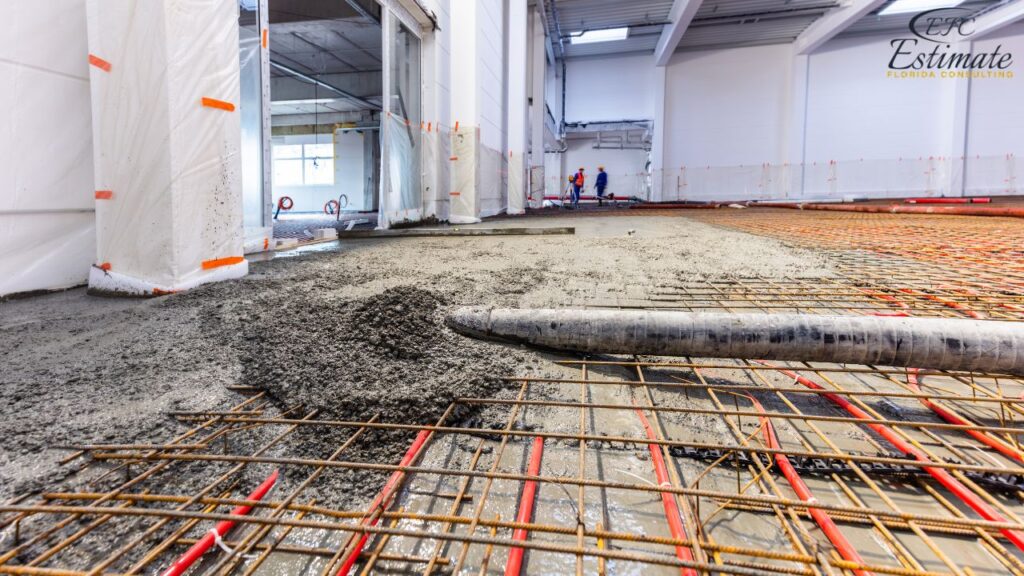
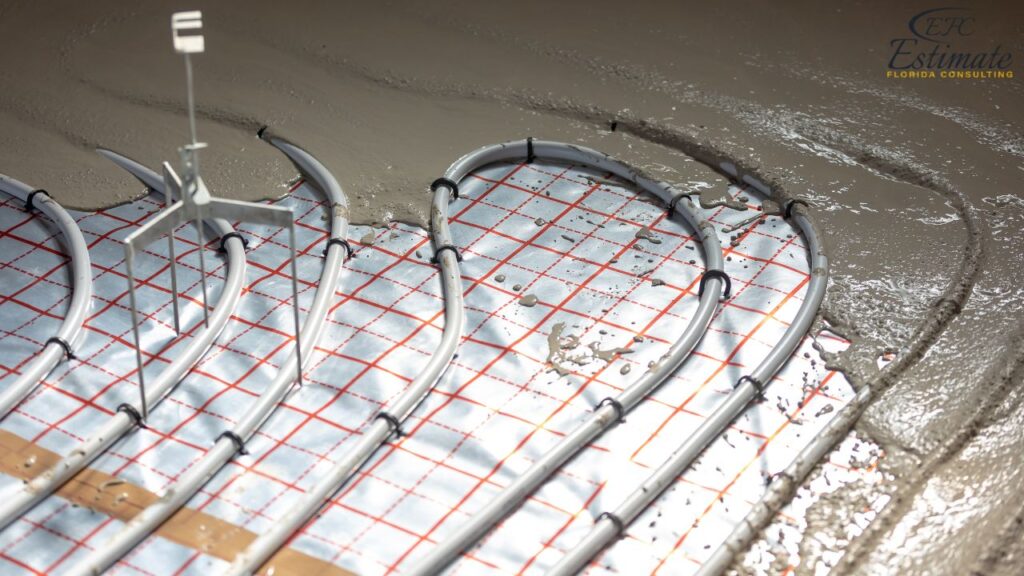
With the tubing secured and the system pressure-tested, you can now pour the concrete. Ensure the concrete mix is suitable for radiant floor heating, typically a mix with good thermal conductivity. Pour the concrete carefully over the tubing, ensuring it is evenly distributed and covers the tubing completely. Use a concrete pump or mixer to facilitate the process. The concrete should be poured in sections to ensure even distribution and avoid creating air pockets. Level the surface using a screed or float to achieve a smooth finish.
Tips for Pouring Concrete:
- Pour in Sections: Pour the concrete in manageable sections to ensure even distribution and prevent the formation of air pockets.
- Use a Screed or Float: Level the concrete surface using a screed or float to achieve a smooth finish. This helps ensure the heating system is embedded uniformly in the slab.
- Avoid Heavy Machinery: Avoid using heavy machinery directly on the tubing to prevent damage. Use lightweight tools and equipment to spread and level the concrete. This step is critical to ensure the integrity of the tubing and the overall performance of the heating system.
7. Cure the Concrete
Allow the concrete to cure for at least 7-14 days, depending on the concrete mix and environmental conditions. Curing is essential for achieving the desired strength and thermal conductivity of the concrete. Keep the concrete moist during the curing process by covering it with plastic sheeting or using a curing compound. Proper curing ensures the concrete reaches its full strength and provides a stable, durable foundation for the radiant heating system. Curing the concrete properly also helps to prevent cracks and ensures the longevity of the installation.
8. Connect the Heat Source
Once the concrete has cured, connect the manifold to the heat source, such as a boiler or water heater. Follow the manufacturer’s instructions for connecting and configuring the system. Ensure all connections are secure and that the system is properly filled and purged of air. The heat source should be capable of providing sufficient heat for the size of the radiant floor system. Proper connection and configuration of the heat source ensure efficient operation and optimal performance of the heating system. Make sure the heat source is properly sized and compatible with the radiant floor system to maximize efficiency and comfort.
9. Test and Balance the System
After connecting the heat source, test the system to ensure it operates correctly. Check for any leaks, verify that the water flows smoothly through the tubing, and ensure the manifold controls are functioning correctly. Adjust the flow rates and balance the system to achieve even heating across the entire floor area. Proper testing and balancing are crucial for ensuring the system operates efficiently and provides consistent warmth throughout the space. Monitor the system closely during this phase to identify and address any issues before they become significant problems.
10. Final Inspection and Start-Up
Conduct a final inspection to ensure all components are installed correctly and functioning. Turn on the heat source and gradually increase the temperature to avoid thermal shock to the concrete. Monitor the system over a few days to ensure it operates smoothly and efficiently. This final phase ensures that the installation is successful and that the system is ready to provide reliable heating. Address any final adjustments or concerns during this period to ensure optimal performance.
Maintenance and Tips
Regular Maintenance
To keep your radiant floor heating system running efficiently, perform regular maintenance checks. This includes inspecting the manifold, checking for leaks, and ensuring the heat source is functioning correctly. Periodically flush the system to remove any sediment or debris that may accumulate in the tubing. Regular maintenance helps prevent issues and extends the lifespan of the system, ensuring consistent performance and energy efficiency. Schedule professional inspections annually to maintain the system’s optimal performance.
Energy Efficiency Tips
- Set a Consistent Temperature: Reduces frequent cycling of the system, saving energy.
- Use Programmable Thermostats: Optimizes energy use by adjusting temperatures based on your schedule.
- Ensure Proper Insulation: Maximizes the efficiency of the heating system by preventing heat loss. Proper insulation of your home can significantly reduce energy consumption and enhance the overall effectiveness of the radiant floor heating system.
Get 5 New Leads Next 7 Days With Our System
- Multi-Family House
- Single-Faimly House
- Modern House
- Duplex
- Ranch House
- Bungalow
Troubleshooting Common Issues
- Uneven Heating: Check for air pockets in the tubing and purge the system if necessary. Uneven heating can also be caused by incorrect tubing spacing or imbalanced flow rates.
- Low Water Pressure: Inspect for leaks or blockages in the system; ensure all connections are secure and properly tightened.
- Strange Noises: These may indicate air in the system or issues with the pump. Bleed the system and check the pump operation to resolve these issues. Regular maintenance and prompt troubleshooting can prevent minor issues from becoming significant problems.
Conclusion
Installing radiant floor heating in a concrete slab requires careful planning and precise execution. By following this detailed guide, you can ensure a successful installation that provides efficient and comfortable heating for your home. Radiant floor heating offers numerous benefits, including energy efficiency, improved comfort, and enhanced air quality. Proper installation and regular maintenance will ensure your system operates efficiently and effectively for years to come. Investing in radiant floor heating not only enhances your home’s comfort but also adds value to your property and contributes to long-term energy savings.
FAQs
Before installation, calculate the heating requirements by performing a heat loss calculation. Consider factors like room size, insulation levels, window sizes, and local climate conditions. Consulting with a heating professional or using online calculators can help ensure you select the right system capacity.
There are two primary types: electric and hydronic (water-based). For concrete slabs, hydronic systems are generally more cost-effective and efficient, especially for larger areas. They use a network of tubes to circulate warm water and can be powered by boilers or water heaters.
Perform regular maintenance checks, including inspecting the manifold, checking for leaks, and ensuring the heat source functions correctly. Periodically flush the system to remove sediment or debris. Schedule professional inspections annually.
- Set a Consistent Temperature: This reduces frequent cycling of the system, saving energy.
- Use Programmable Thermostats: Adjust temperatures based on your schedule to optimize energy use.
- Ensure Proper Insulation: This maximizes the system’s efficiency by preventing heat loss.
- Uneven Heating: Check for air pockets in the tubing and purge the system if necessary. Ensure correct tubing spacing and balanced flow rates.
- Low Water Pressure: Inspect for leaks or blockages and ensure all connections are secure.
- Strange Noises: These may indicate air in the system or issues with the pump. Bleed the system and check pump operation.
Google Reviews



Process To Get Radiant Floor Heating Cost Estimate Report
Here I am going to share some steps to get radiant floor heating cost estimate report.
-
You need to send your plan to us.
You can send us your plan on info@estimatorflorida.com
-
You receive a quote for your project.
Before starting your project, we send you a quote for your service. That quote will have detailed information about your project. Here you will get information about the size, difficulty, complexity and bid date when determining pricing.
-
Get Estimate Report
Our team will takeoff and estimate your project. When we deliver you’ll receive a PDF and an Excel file of your estimate. We can also offer construction lead generation services for the jobs you’d like to pursue further.

