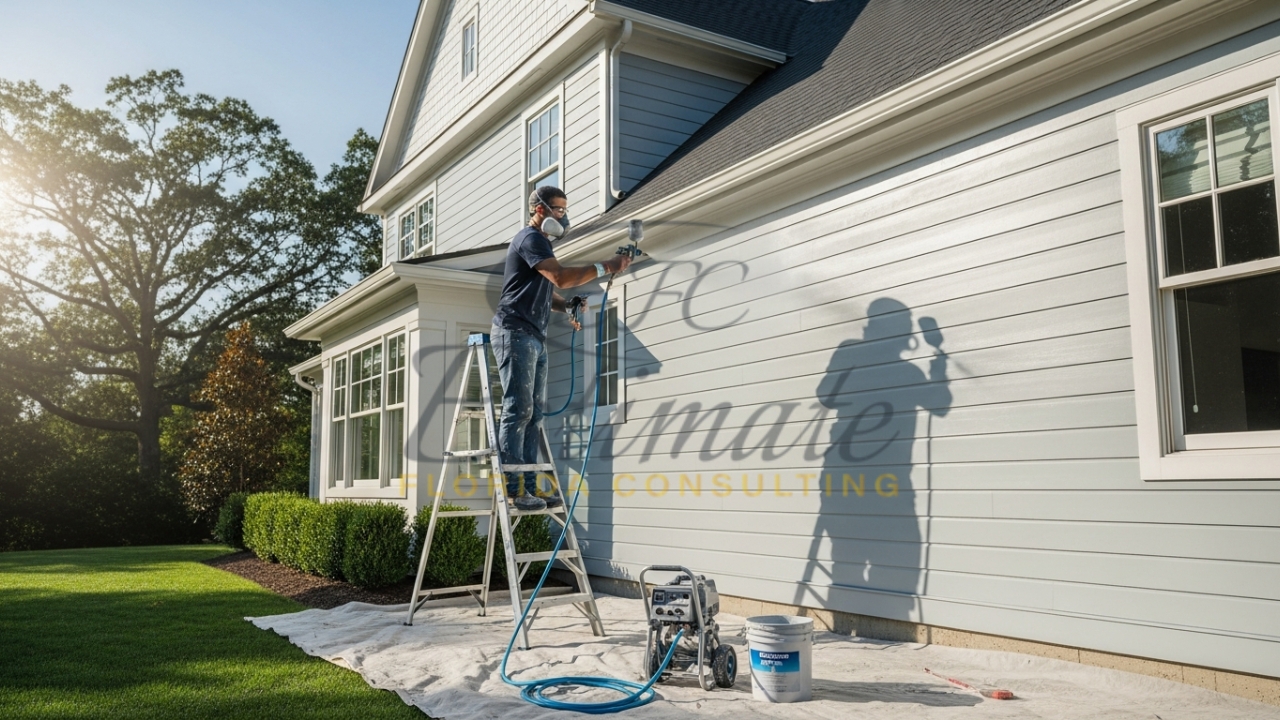
In the painting business, efficiency isn’t just about speed, it’s about margin. For large exterior projects, using an airless sprayer is the most effective way to paint. It offers speed and coverage that traditional brushing and rolling simply cannot match.
However, speed means nothing if you have to redo the work or fix a broken machine halfway through. Mistakes with airless spray equipment don’t just ruin the finish; they eat directly into your profits through wasted paint and downtime. Whether you’re a seasoned contractor or a novice painter, avoiding these seven common mistakes will keep your project on schedule and your budget intact.
Undersizing the Sprayer
As the industry saying goes, “You can pay now, or you can pay later.”
Many contractors try to get by with a small airless paint sprayer on a large exterior project. While the machine might physically move the paint, it isn’t built for the volume.
Using a pump that is undersized for the workload means it will be overworked by the daily grind. It has to run at maximum capacity just to keep up, leading to overheating and breakdowns right when you need speed the most.
To prevent costly downtime, match the tool to the demand. Check the typical “Gallons Per Week” ratings below:
| Airless Sprayer | Productivity Level | Recommended Weekly Gallons |
| Entry Electric | Low | Up to 150 gallons |
| Small Electric / Gas | Medium | Up to 500 gallons |
| Large Electric / Gas | High | Up to 1000 gallons |
For commercial exteriors, investing in a heavy-duty airless sprayer ensures you have the durability to handle high-volume days without risking a breakdown.
Using Too Much Pressure
It is true that airless sprayers rely on high pressure to atomize paint, but spraying with the pressure set too high is also a common mistake.
Many contractors turn the pressure knob to the max, hoping to speed up the job or force thicker coatings through the tip. However, this doesn’t actually make you faster. The flow rate is limited by the spray tip size, not the pressure.
When the pressure is higher than necessary, it creates unnecessary paint mist and overspray. Additionally, it overloads the pump, increasing the wear on pistons, seals, and valves. The same wear applies to spray tips, which degrade much faster under high pressure.
To get the best results, start with the pressure low and gradually increase it just until the paint atomizes cleanly. A perfect spray pattern should look like this:
Complete atomization
An evenly distributed fan pattern.
No “fingers” or “tails”
Using Worn Tips
“The tip is still spraying, so it works fine.” Many contractors make this mistake. They wait until a tip completely stops working before they change it. But a worn tip wastes money long before it breaks.
Here’s what really happens as a spray tip wears: The opening slowly gets bigger, but the spray fan gets smaller. For example, a tip that once sprayed a 12-inch fan may only give a 9-inch fan after wear. That means more paint is going through a smaller area. To cover the same wall, you have to slow down or make extra passes, using more paint and ending up with a heavier, less even coat.
To help spray tips last longer, always strain your paint and use the lowest pressure that still gives a clean spray. If lines or tails show up on the edges and don’t go away, it’s time to replace the tip. This costs far less than wasting paint.
Ignoring the Wind
Exterior painting is often at the mercy of the weather. A common mistake is trying to spray when it’s too windy. This can cause overspray to land where it shouldn’t, such as on windows, landscaping, or cars parked down the street.
Airless sprayers break paint into a fine mist. Even a light breeze can carry this mist much farther than expected. It’s not just about wasted paint. It’s about the mess it leaves behind. Instead of moving on to your next job, you might end up spending your profit on cleaning or insurance claims.
To avoid this, always check the wind before you start. Use a spray shield (cardboard works well) to protect edges and keep your gun close to the surface, usually about 10 to 12 inches. If the wind is too strong, it’s always cheaper to wait than to clean up afterward.
Painting in Direct Sunlight
Just like wind, the sun is a major factor in exterior painting. A common mistake is spraying walls that are baking in direct sunlight.
Painters often check the air temperature, but the surface temperature is what really counts. In direct sunlight, especially on dark surfaces, the wall can be much hotter than the air. Paint needs time to soak into the surface to bond properly. On a hot wall, it dries almost instantly, sitting on top like a skin instead of bonding. This leads to lap marks, bubbles, and paint that peels over time.
To avoid this, follow the rule of “chasing the shade.” Plan your day so you are always working on the side of the building that is out of the sun. If you must paint in the heat, try to keep your machine and material in a shaded spot to prevent paint from drying inside the tip.
Skipping the Back-roll
Spraying is the most efficient way to apply a thick, protective coat on exteriors. However, when applying paint heavily on vertical surfaces, gravity takes over. A common mistake is ignoring the runs and sags that can happen before the paint dries.
When working fast on exterior siding or corners, paint can sometimes build up too quickly. If the painter just sprays and walks away, these drips will dry on the wall. This leaves an ugly, unprofessional finish that is hard to fix later.
To make sure the job looks good, keep a roller handy. You don’t necessarily need to roll the entire wall, but you should use it to smooth out any runs or sags right away while the paint is wet. This simple step helps make the finish even.
Neglecting Cleanup
The job isn’t done when the wall is painted. It is done when the sprayer is clean.
After a long day, it is common to rush the cleanup or leave paint in the machine overnight. But this is the fastest way to damage the machine. Dried paint can clog valves and mess with the pressure, making it harder to use the sprayer next time.
To keep your machine running smoothly, always flush it with water or mineral spirits immediately after use. Make sure to remove and clean both the gun filter and the manifold filter every time. If they are clogged or damaged, replace them immediately.
While cleaning, take a minute to check the wear parts. Check your hoses for kinks or weak spots, and look at the seals. Replacing a worn O-ring now is much easier than fixing a leak in the middle of a job.
Finally, if the sprayer will sit for a few days, never leave water in it, as this leads to corrosion. Use a storage fluid to prevent rust and keep the internal seals lubricated.
Conclusion
Exterior painting is a demanding job that requires both speed and precision. For a contractor, avoiding these common mistakes is the best way to protect your profit margins.
Taking the time to check your equipment, watch the weather, and follow proper techniques makes a huge difference. These steps ensure a durable finish that satisfies your customers. Ultimately, using your tools correctly is what builds a strong reputation for your business.